🏋️♀️ Use Jira for Agile Product Management
Introduction

Jira est l'un des outils de gestion de tâches les plus puissants pour Scrum. C'est l'une des principales raisons pour lesquelles il est utilisé si souvent dans le développement logiciel. Jira fournit tous les outils dont tu as besoin pour créer et gérer ton backlog (liste priorisée des tâches) ainsi que pour lancer et suivre un sprint.
Cette quête est une introduction aux fonctionnalités de base de Jira.
Suis bien chaque étape, à la fin de ce challenge on te demandera de poster une capture d'écran de ton tableau de bord Jira.
🤓 À la fin de cette quête, tu comprendras :
- ✅ Ce qu'est Jira
- ✅ Comment créer ton compte sur Jira
- ✅ Comment créer ton backlog
- ✅ Comment lancer un sprint
- ✅ Comment afficher le burndown chart (graphique qui montre le travail restant au fil du sprint)
Chapitre 01 : Qu'est-ce que Jira

Jira est un outil créé par une entreprise qui s'appelle Atlassian. Il est utilisé dans les entreprises tech pour le bug tracking (suivi des bugs) et la gestion de projet. Il est pratique pour gérer et faire tourner des projets scrum.
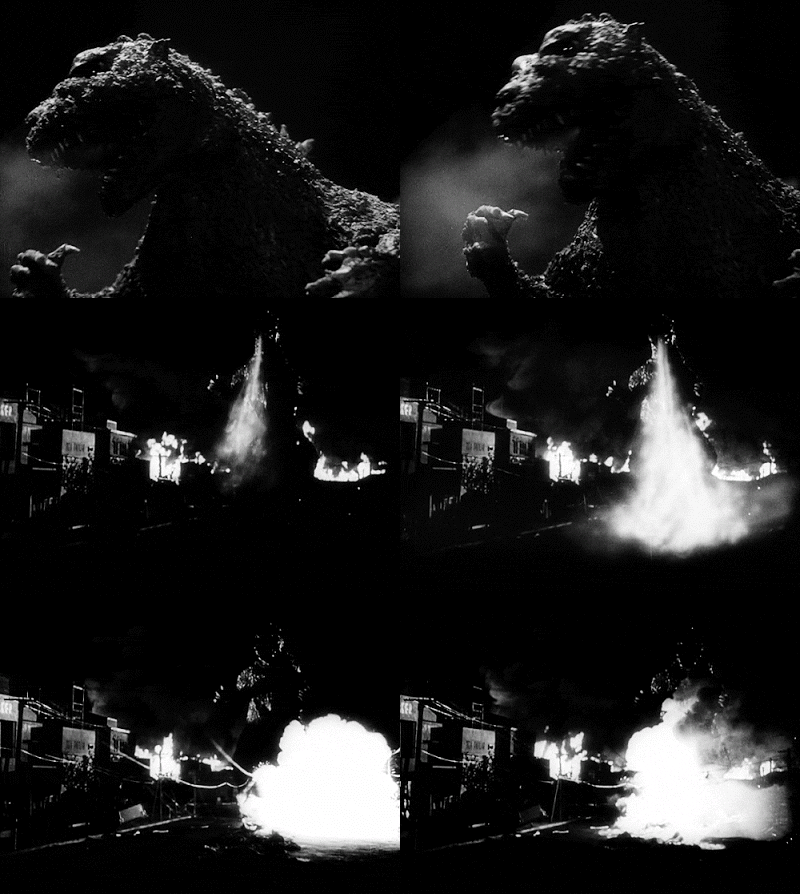
Info utile : Jira s'appelle "Jira" parce que "Godzilla" en japonais se dit "Godjira".
Chapitre 02 : Crée ton compte
La première étape à réaliser pour pouvoir utiliser Jira, c'est de créer un compte ! Suis bien toutes les étapes ci-dessous pour créer ton compte.
Va sur https://www.atlassian.com/software/jira et clique sur Get it free pour créer ton compte !
Ensuite tu devras :
- créer ton compte.
- choisir ton produit (en général Jira et Confluence, que l'on peut aussi utiliser pour la documentation).
- Donner le nom du site (ce nom ne concerne pas seulement ton projet mais tous les produits Jira, donc tu peux donner ton nom comme nom de site)
- Puis suivre les étapes et répondre aux questions
- Sélectionner le template (modèle) pour Scrum
- Écrire le nom de ton projet
Chapitre 03 : Crée ton product backlog dans Jira
Maintenant, il est temps d'ajouter quelques user stories à ton backlog !
Pour créer une user story dans Jira, clique dans le panneau de gauche sur "Backlog".
Dans la partie backlog de la page, tape ta user story puis appuie sur "Entrée" une fois ta user story écrite.
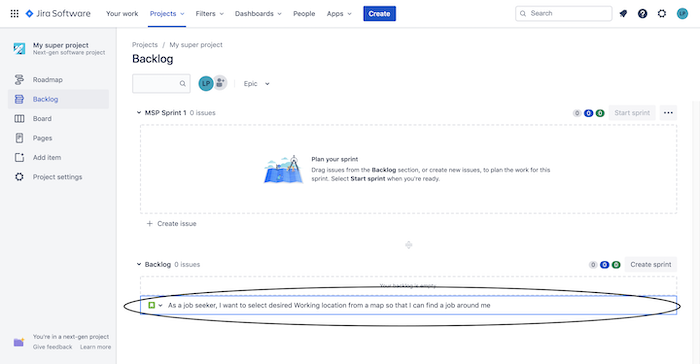
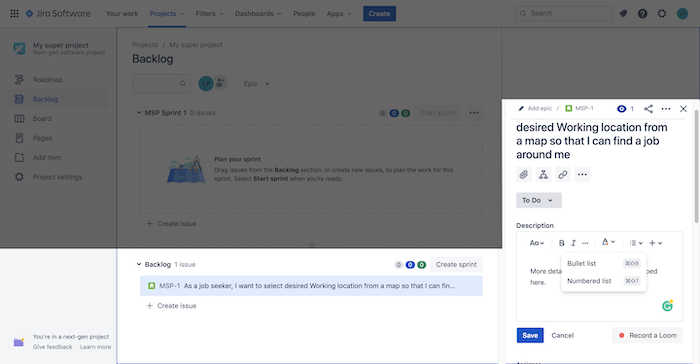
Si tu cliques sur la user story, cela ouvre un petit panneau sur la droite avec tout le détail de la carte que tu peux remplir. Par exemple, dans la description tu peux ajouter les acceptance criteria (critères d'acceptation, ce qui doit être vrai pour que la tâche soit considérée comme terminée) pour cette tâche, tu peux aussi assigner la tâche à un membre précis de l'équipe.

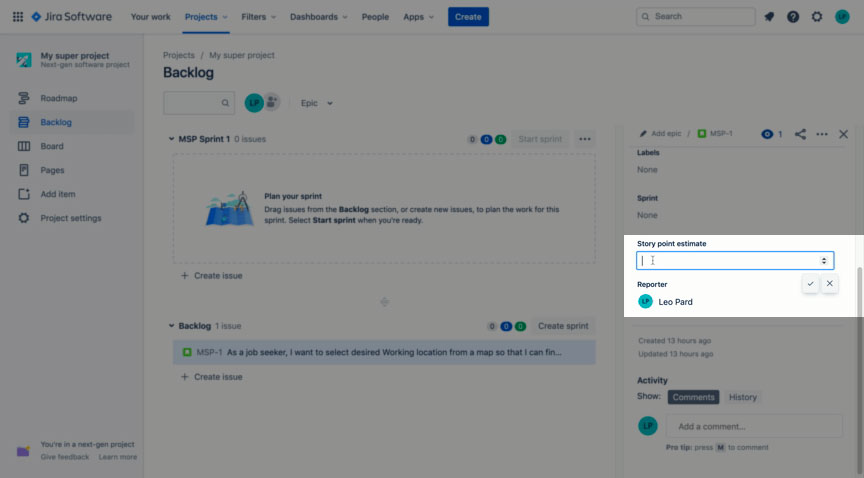
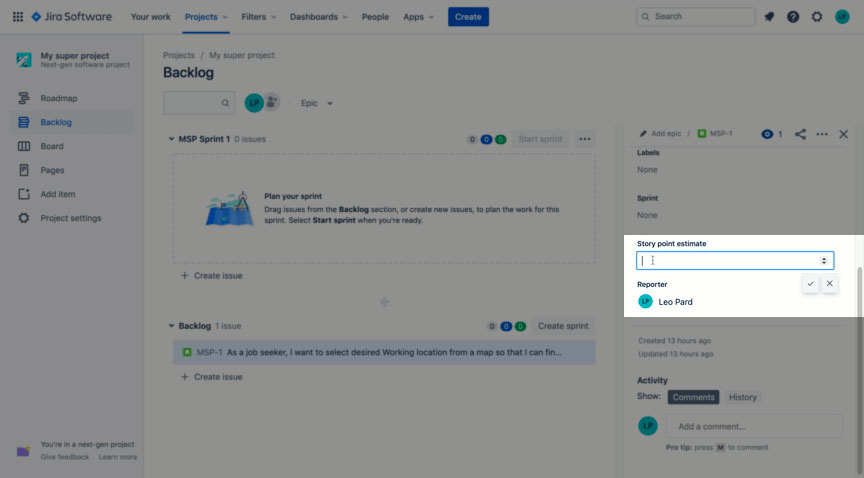
Il est aussi possible d'ajouter le nombre de story point (unité d'estimation de l'effort d'une tâche) pour chaque user story, que tu peux remplir une fois le planning poker réalisé.
Et voilà ! Tu peux maintenant créer autant de user stories que tu veux pour construire ton backlog !
Plutôt facile, non ?
🏃 Chapitre 04 : Lance un sprint !
Ok... Inscription : faite ! Backlog : fait !
Maintenant, l'étape suivante c'est de démarrer notre sprint.
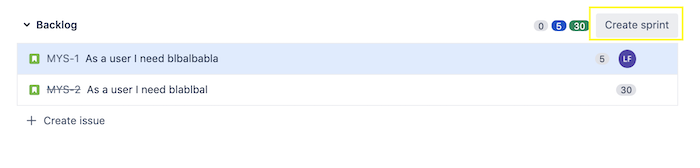
Tu peux démarrer ton sprint dans Jira en utilisant le bouton Create sprint.
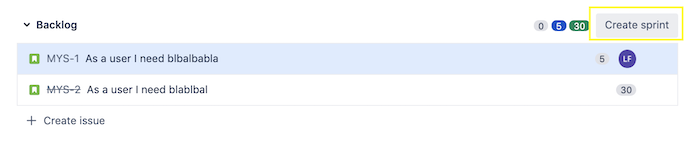 Ensuite, fais simplement un glisser-déposer de la user story que tu veux ajouter depuis le backlog vers le sprint.
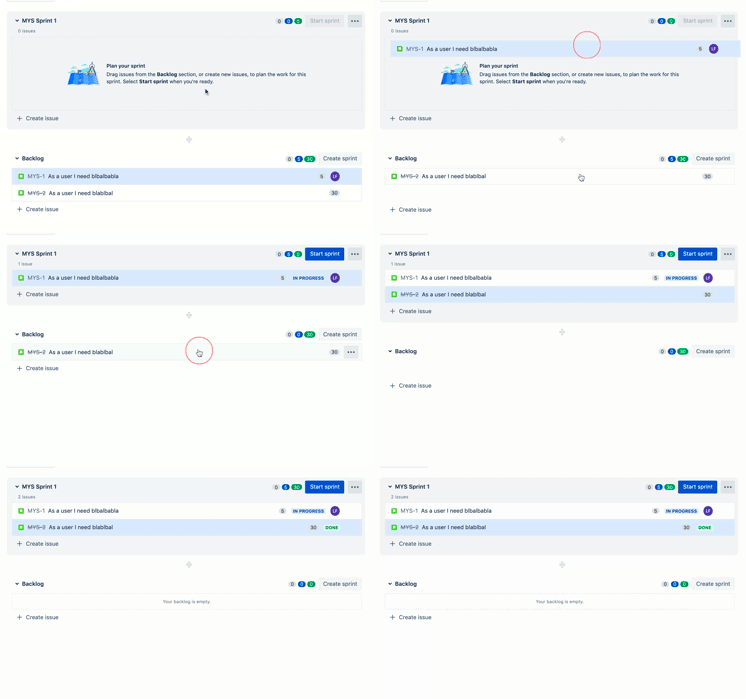 Une fois que tu as toutes les cartes que tu veux dans ce sprint, clique sur le bouton start sprint.
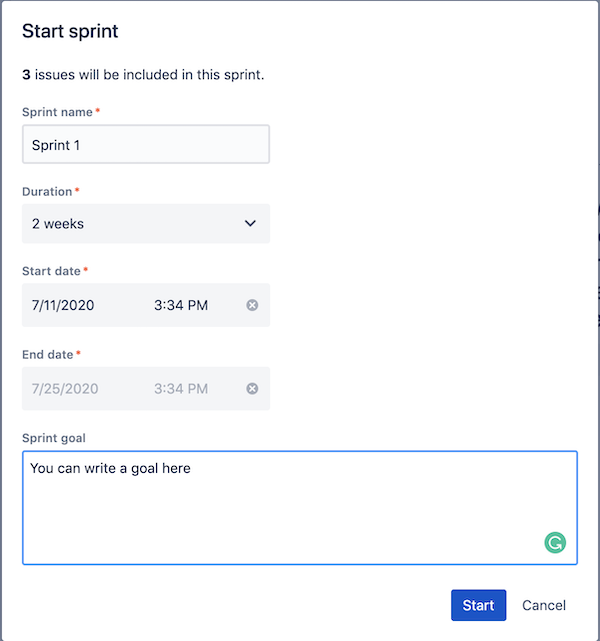
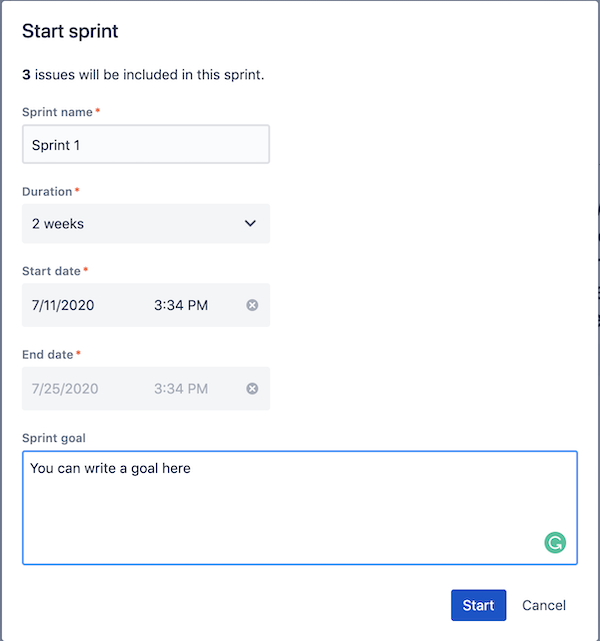
Tu devrais alors voir une fenêtre (modale) où tu peux remplir les informations concernant ton sprint. Le nom du sprint, la durée, les dates et l'objectif.
Le sprint board (tableau du sprint)
Le sprint board est un tableau où tu peux voir la progression des différentes tâches.
Il a en général quelques colonnes qui sont :
- Todo (à faire)
- In progress (en cours)
- Done (terminé)
Quand une tâche est terminée, fais simplement un glisser-déposer de la tâche vers la colonne suivante !
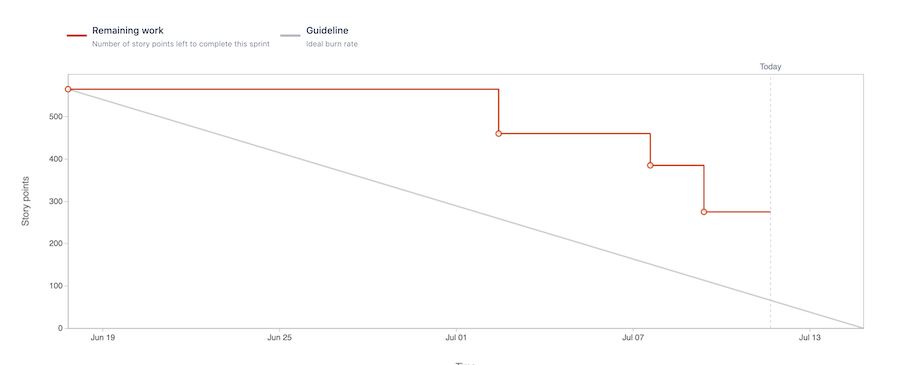
Burndown Chart dans Jira
Étape 03 : Clique sur l'onglet Reports
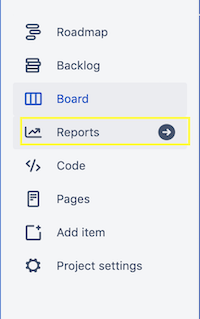
Reviens sur le projet et clique sur l'onglet Reports (rapports).
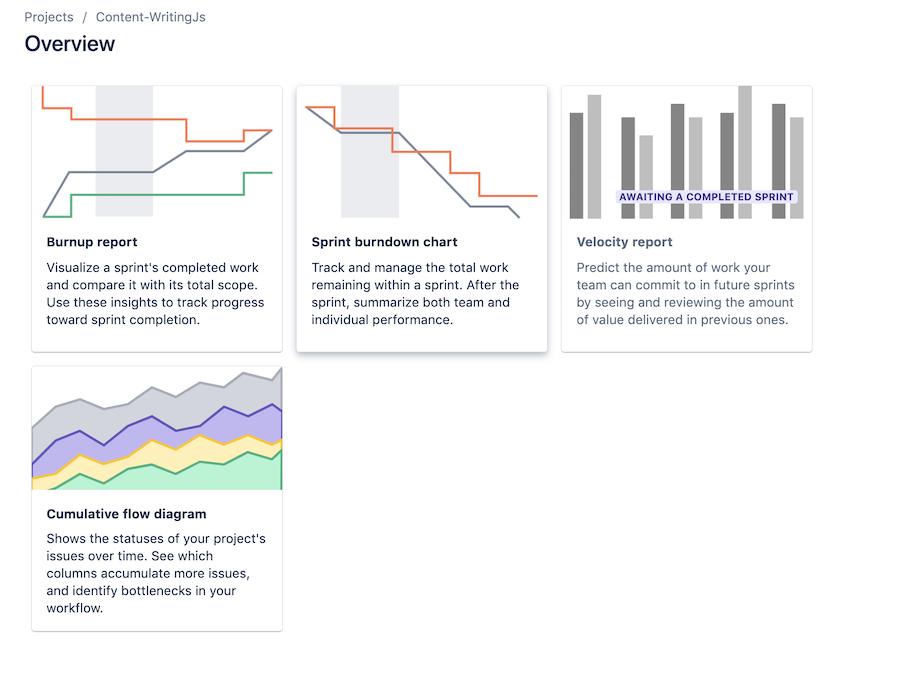
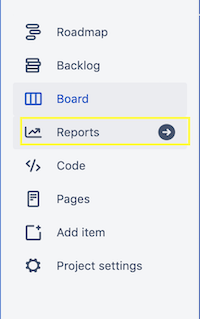 Ensuite tu peux cliquer sur Reports et sélectionner sprint burndown chart.
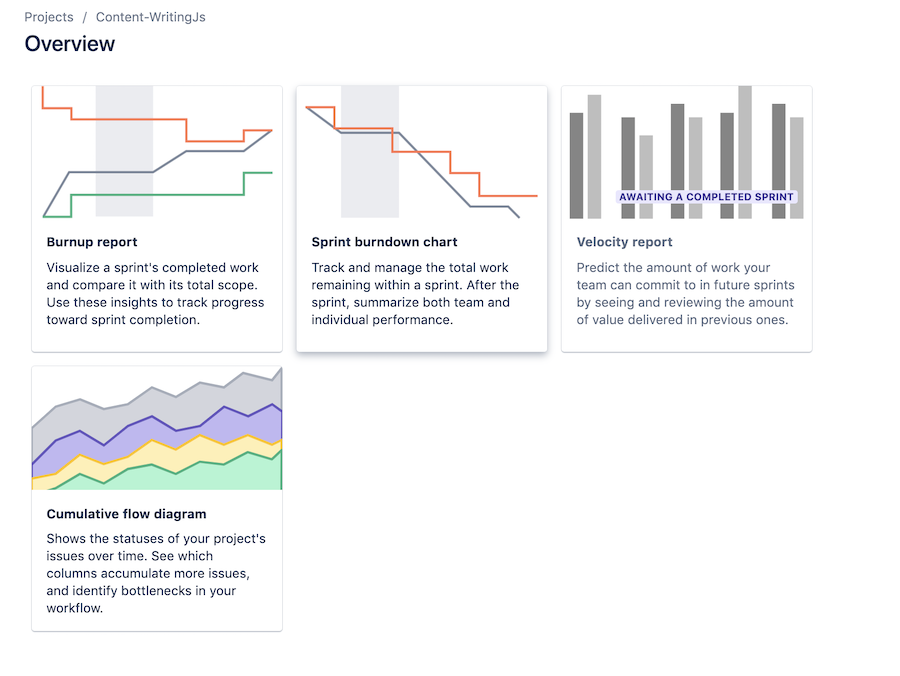
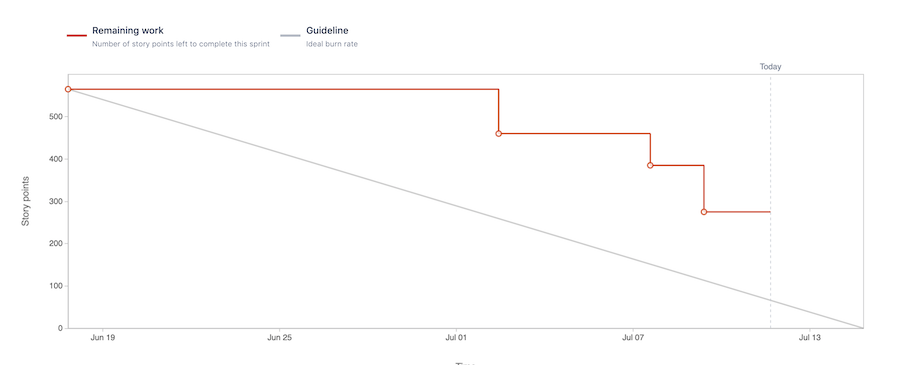
Si tu viens juste de démarrer le sprint, tu ne devrais rien voir se passer, mais si tu reviens dans quelques jours tu devrais voir le graphique !
🎬 Tutoriels vidéo Jira pour le workflow de gestion de produit
01: Jira Introduction - Modern Software Development
02: How to use Jira Tool for Beginners (Product Owner/Manager Profil)
03: How to set up a Scrum Project in JIRA
04: Running an Agile Project in JIRA: Epics, Stories, Bugs, and Tasks
05: How to write User Story and Acceptance Criteria in JIRA
06: Building Roadmaps in Jira Software
07: Quick Filters and Swimlanes in Jira
08: Burndown Charts - Jira Reports Tutorial
☝️ Résumé
- Jira est un outil de gestion de projet utilisé dans le développement logiciel
- Jira va nous permettre de créer et gérer le backlog, de lancer et suivre notre sprint
💪 Challenge
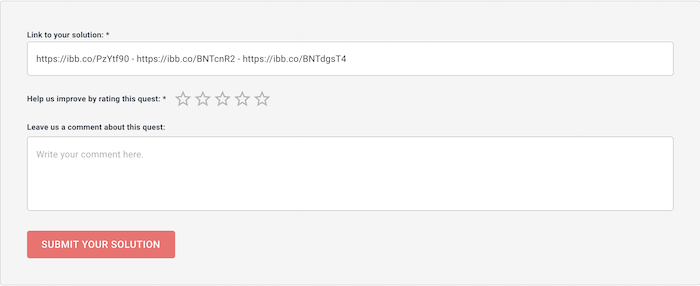
Prends une capture d'écran de ton backlog, de ton sprint board et de ton burndown chart. Tu peux utiliser imgbb ou imgur pour obtenir un lien à partager pour ton image.
Ajoute les trois liens sur la même ligne séparés par un -
🧐 Critères de validation
- [ ] La solution contient une capture d'écran de ton backlog avec des user stories.
- [ ] La solution contient une capture d'écran d'un sprint board avec des user stories.
- [ ] La solution contient une capture d'écran du burndown chart.
Introduction

Jira is one of the most powerful task management tools for Scrum. This is one of the main reasons why it's used so often in Software development. Jira provides all the tools that you need to create and manage your backlog as well as launch and monitor a sprint.
This quest is an introduction to the basic features in Jira.
Please follow the step carefully, at the end of this challenge you will be asked to post a screenshot of your Jira dashboard.
🤓 By the end of this quest, you will understand:
- ✅ What Jira is
- ✅ How to create your account on Jira
- ✅ How to create your backlog
- ✅ How to launch a sprint
- ✅ How to display the burndown chart
Chapter 01: What is Jira

Jira is a tool created by a company called Atlassian. It's used in tech companies for bug tracking and project management. It's useful to manage and run scrum projects.
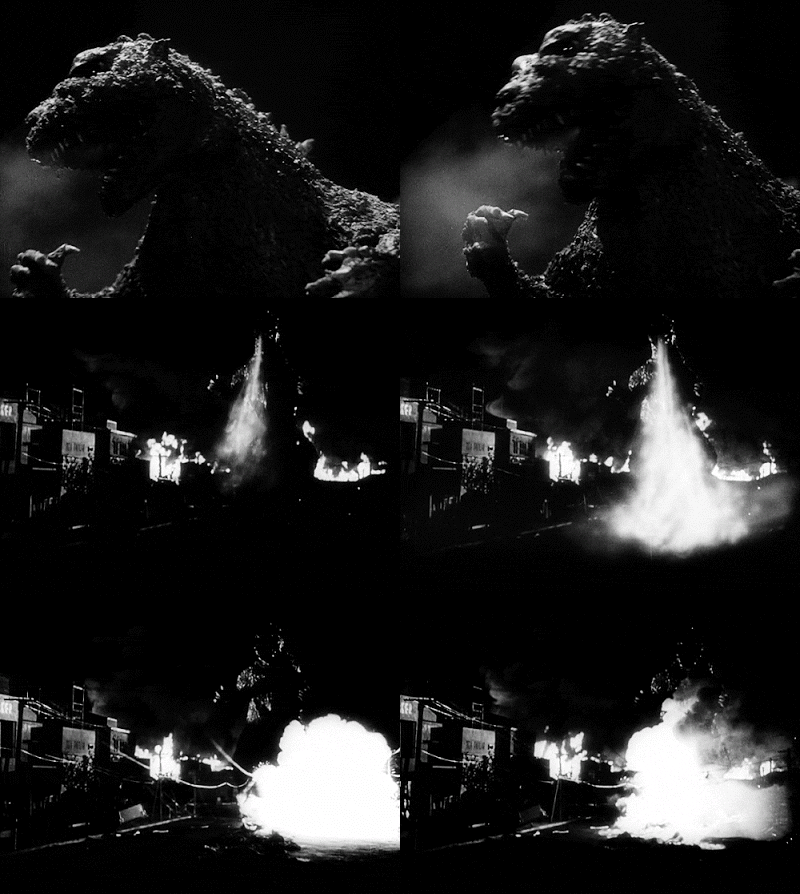
Useful info: Jira is called "Jira" because "Godzilla" in Japanese is called "Godjira".
Chapter 02: Create your account
The first step to complete to be able to use Jira is to create an account! Follow carefully all the steps here to create your account.
Go to https://www.atlassian.com/software/jira and click on Get it free to create your account!
Then you would have to:
- create your account.
- choose your product (usually Jira and Confluence, which we can also use for documentation).
- Give the site name (the name should be not only for your project but for all Jira products so you can give your name for sitename)
- Then follow the steps and answer the questions
- Select the template for Scrum
- Write the name of your project
Chapter 03: Create your product backlog in Jira
Now, it's time to add some user stories to your backlog!
To create a user story in Jira, click on the left panel on "Backlog".
In the backlog side of the page, type your user story then press "Enter" when your user story is written.
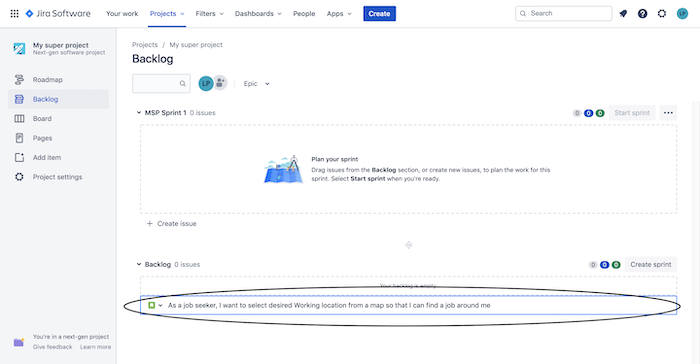
If you click on the user story, it will open a small panel on the right with all the card detail that you can fill out. For example, in the description you can add the acceptance criteria for this task, you can also assign the task to a specific team member.
It's also possible to add the number of story point for each user stories that you can fill once you have done the planning poker.
That's it! You can now create as many user stories as you want to create your backlog!
Pretty easy, isn't it?
🏃 Chapter 04: Start a sprint!
Ok... Registration: done! Backlog: done!
Now, the next step is to start our sprint.
You can start your sprint in Jira by using the Create sprint button.
 Then, simply drag and drop the user story that you want to add from the backlog to the sprint.
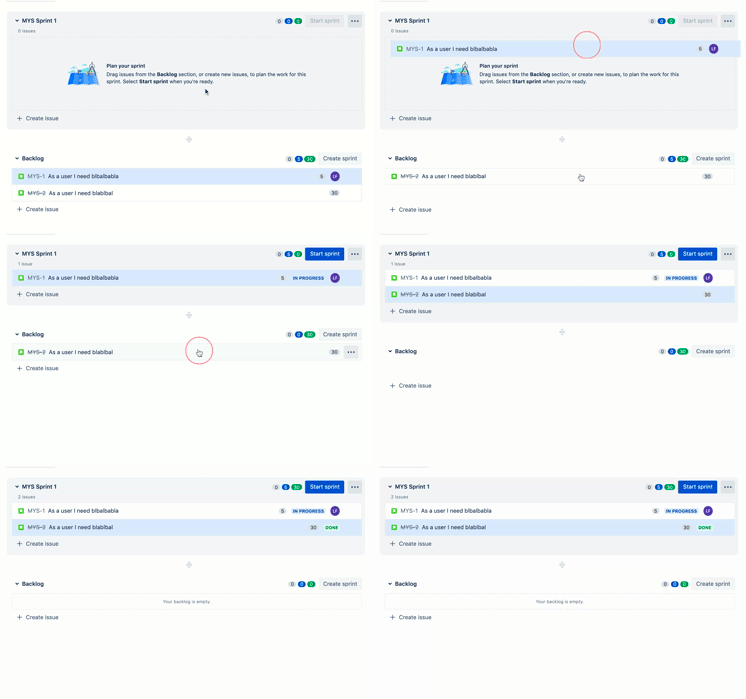 Once you have all the card that you want to have on this sprint, click on the button start sprint.
You should then see a modal where you can fill the information regarding your sprint. The name of the sprint, the duration, the dates and the goal.
The sprint board
The sprint board is a board where you can see the progression of the different tasks.
It usually has a few columns which are:
- Todo
- In progress
- Done
When a task is done, simply drag and drop the task to the next column!
Burndown Chart in Jira
Step 03: Click on the Reports tab
Come back to the project and click on the Reports tab.
 Then you can click on Reports and select sprint burndown chart.
If you just started the sprint you shouldn't see anything going on, but if you come back in a few days you should see the graph!
🎬 Jira Video Tutorials for product management workflow
01: Jira Introduction - Modern Software Development
02: How to use Jira Tool for Beginners (Product Owner/Manager Profil)
03: How to set up a Scrum Project in JIRA
04: Running an Agile Project in JIRA: Epics, Stories, Bugs, and Tasks
05: How to write User Story and Acceptance Criteria in JIRA
06: Building Roadmaps in Jira Software
07: Quick Filters and Swimlanes in Jira
08: Burndown Charts - Jira Reports Tutorial
☝️ Summary
- Jira is a project management tool used in software development
- Jira will allow us to create and manage backlog, run and monitor our sprint
💪 Challenge
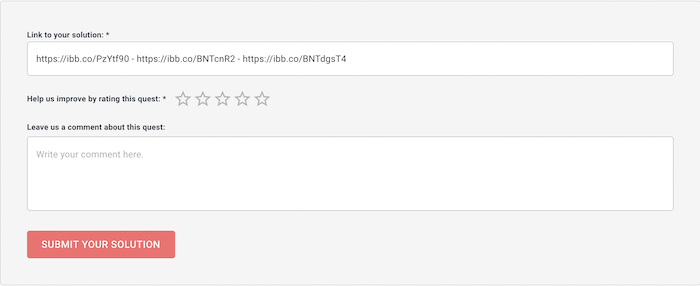
Take a screenshot of your backlog, your sprint board and your burndown chart. You can use imgbb or imgur to get a link to share your image.
Add the three links in the same line separated by a -
🧐 Validation criteria
- [ ] The solution contains a screenshot of your backlog with user stories.
- [ ] The solution contains a screenshot of a sprint board with user stories.
- [ ] The solution contains a screenshot of the burndown chart.