✏️ Exercise OOP - Let's build a game!
Challenge d'introduction
⚠️ Avant de commencer cet exercice, tu dois avoir terminé certaines des quêtes JavaScript
💪 Challenge
Construisons un jeu !
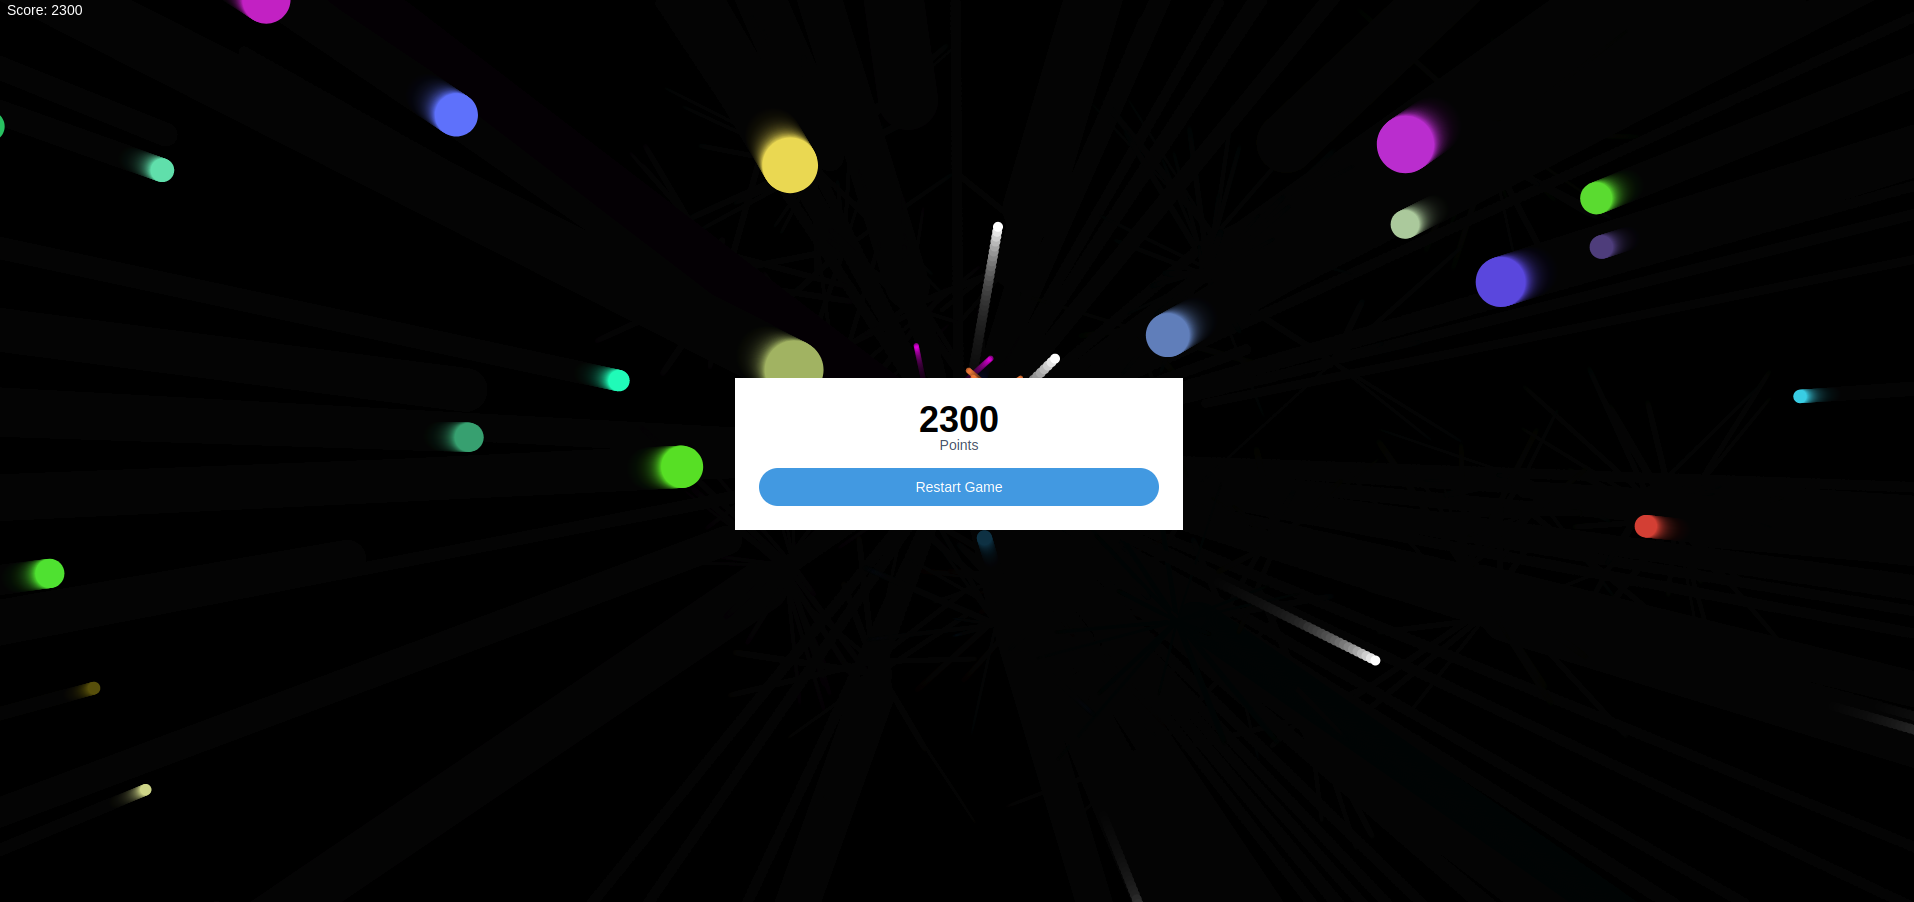
À la fin de ce challenge, on espère que tu remarqueras à quel point les classes et les objets peuvent être utiles en JavaScript, et à quel point le concept de Object-Oriented Programming (programmation orientée objet) est puissant en programmation.
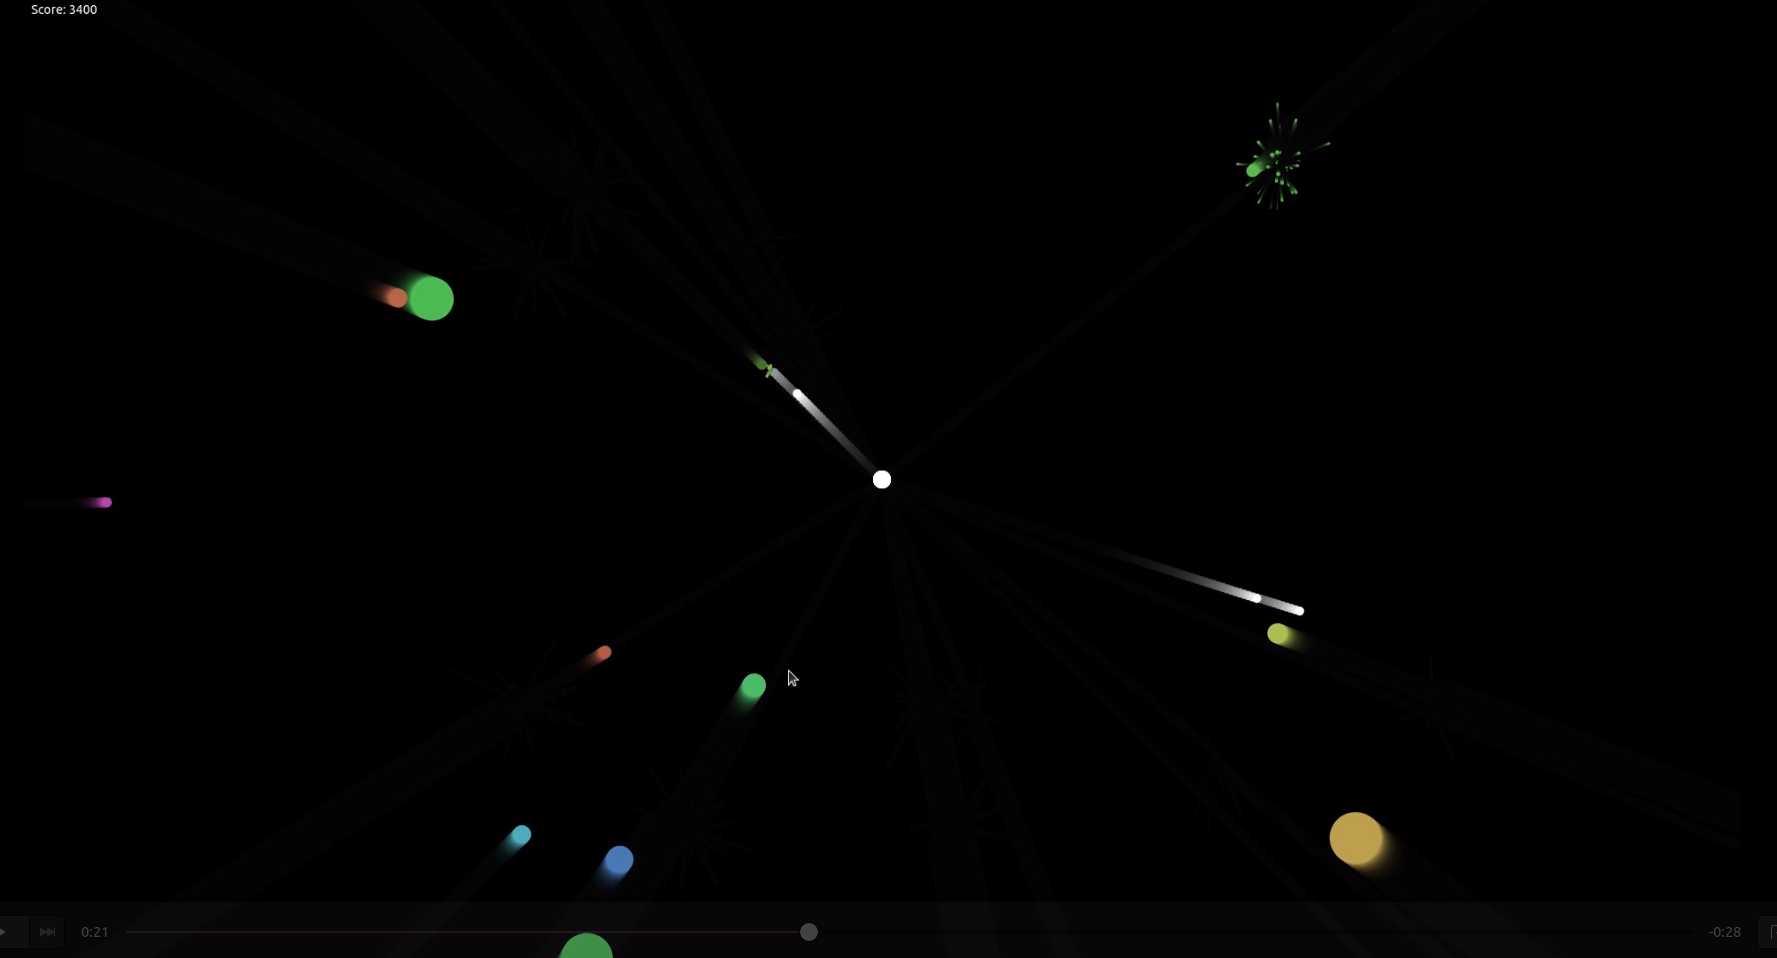
Le but de ce challenge est de construire un jeu de tir dans ton navigateur web.
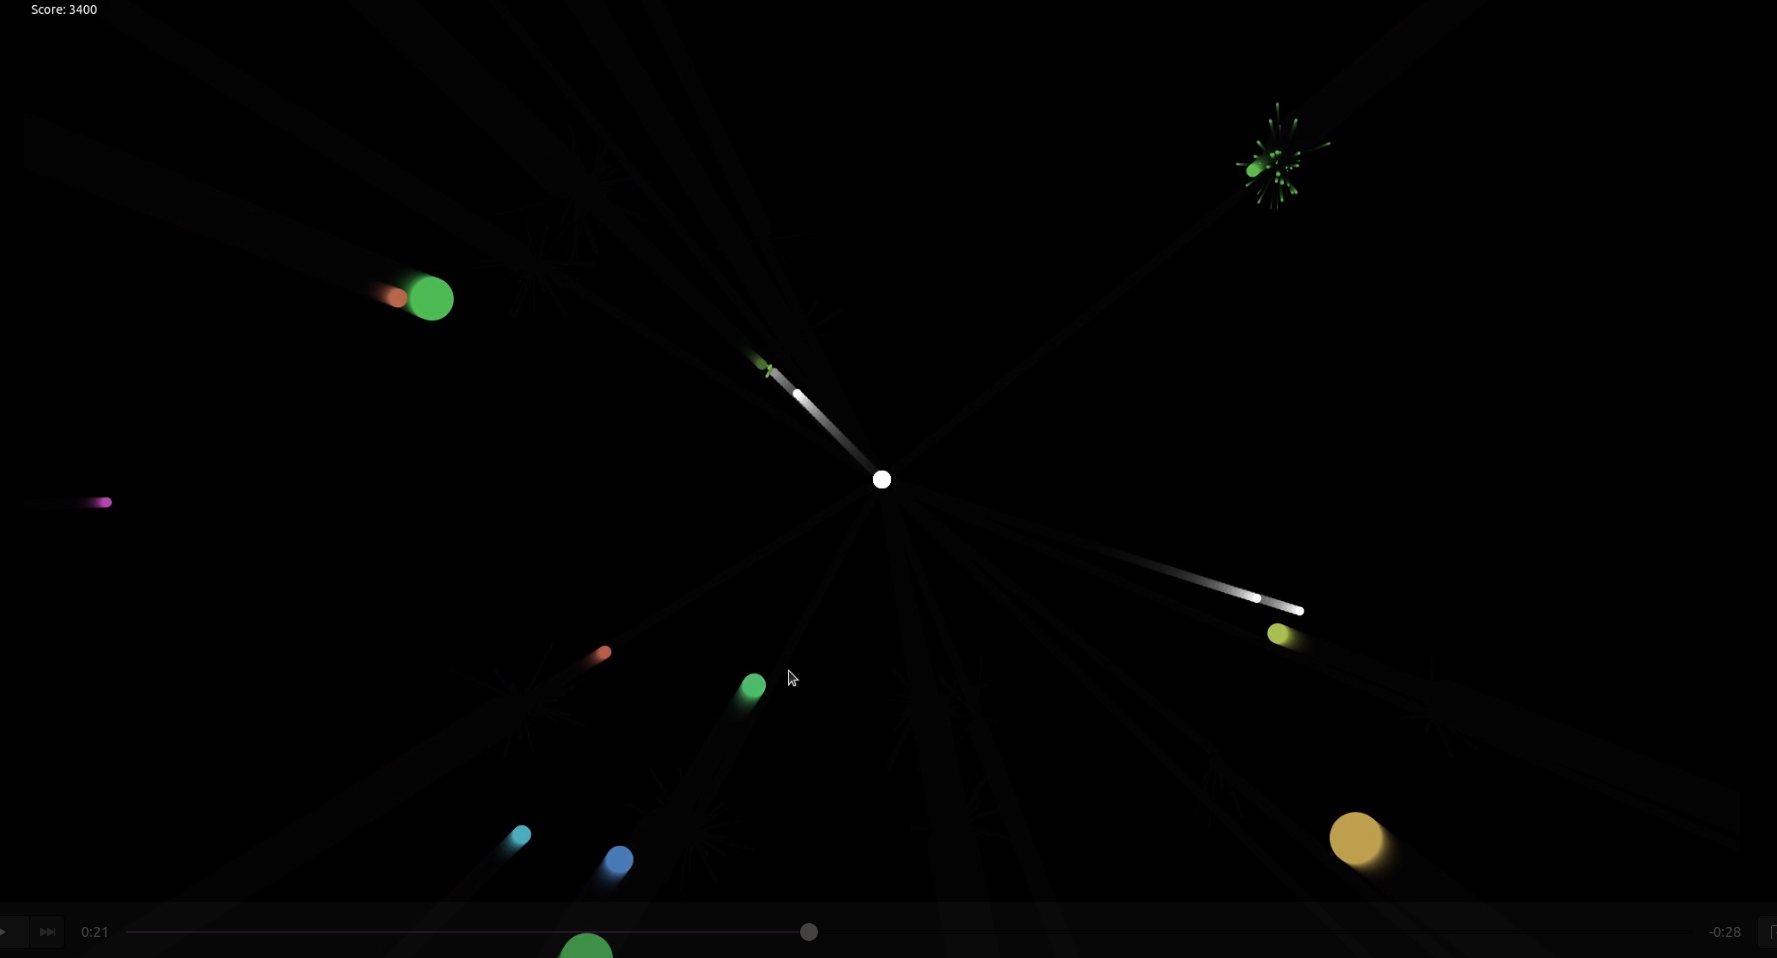 Pour ce challenge, on va apprendre à utiliser la balise canvas, afin de dessiner à l'intérieur.
Étape 1 - Démarrer notre projet
La première étape consiste à préparer nos fichiers dans le dossier de notre projet.
Fichiers :
- index.html
- index.js
- style.css
À faire
- [ ] Créer les 3 fichiers
- [ ] Dans
index.html, ajoute la structure de base d'un fichier html - [ ] Relie
style.cssàindex.html - [ ] Ajoute une balise
<script>dans l'élément<body>, pour relierindex.jsàindex.html - [ ] Ajoute un élément
<canvas>dans l'élément<body>, avec un idgame-container(regarde les liens juste en dessous pour plus d'explications sur l'élément canvas) - [ ] Dans
index.js, crée une variable nommée "canvas" et assigne-lui l'élément DOM ayant l'id game-container. - [ ] Avec les propriétés
innerWidthetinnerHeightde l'objetwindow, change lawidthet laheightducanvaspour prendre tout l'espace disponible dans la fenêtre du navigateur.
Explications sur la balise canvas.
Comment utiliser la balise canvas.
<!DOCTYPE html>
<html lang="en">
    <head>
        <meta charset="UTF-8" />
        <meta http-equiv="X-UA-Compatible" content="IE=edge" />
        <meta name="viewport" content="width=device-width, initial-scale=1.0" />
        <title>JS Game with OOP</title>
        <link rel="stylesheet" href="style.css" />
    </head>
    <body>
        <canvas id="game-container"></canvas>
        <script src="index.js"></script>
    </body>
</html>
const canvas = document.querySelector("#game-container");

canvas.width = innerWidth;
canvas.height = innerHeight;
* {
    margin: 0;
    padding: 0;
}

body {
    background-color: black;
    overflow: hidden;
}
Étape 2 - Créer un joueur
Cette étape consiste à créer un joueur représenté par un disque dans le canvas.
D'abord, on a besoin de récupérer le context (contexte) du canvas, à travers ce context, on pourra dessiner dans le canvas à l'aide de la Canvas API.
const ctx = canvas.getContext('2d');
On peut dessiner n'importe quelle forme qu'on veut, comme un disque, avec cette syntaxe :
ctx.beginPath();
ctx.arc(x, y, radius, start angle, end angle, anticlockwise);
ctx.fillStyle = color;
ctx.fill();
Dans la méthode arc, x et y sont les coordonnées du centre du disque dans le canvas.

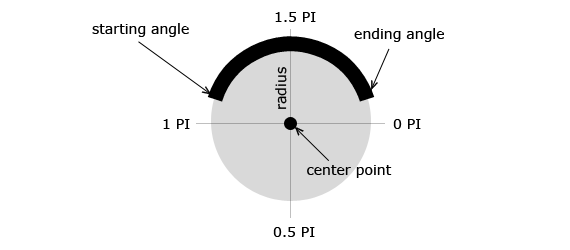 La propriété fillStyle et la méthode fill nous permettent de remplir l'arc avec une couleur et l'arc devient un disque.
const canvas = document.querySelector("#game-container");
const ctx = canvas.getContext("2d");

canvas.width = innerWidth;
canvas.height = innerHeight;

ctx.beginPath();
ctx.arc(canvas.width / 2, canvas.height / 2, 30, 0, Math.PI * 2, false);
ctx.fillStyle = "red";
ctx.fill();
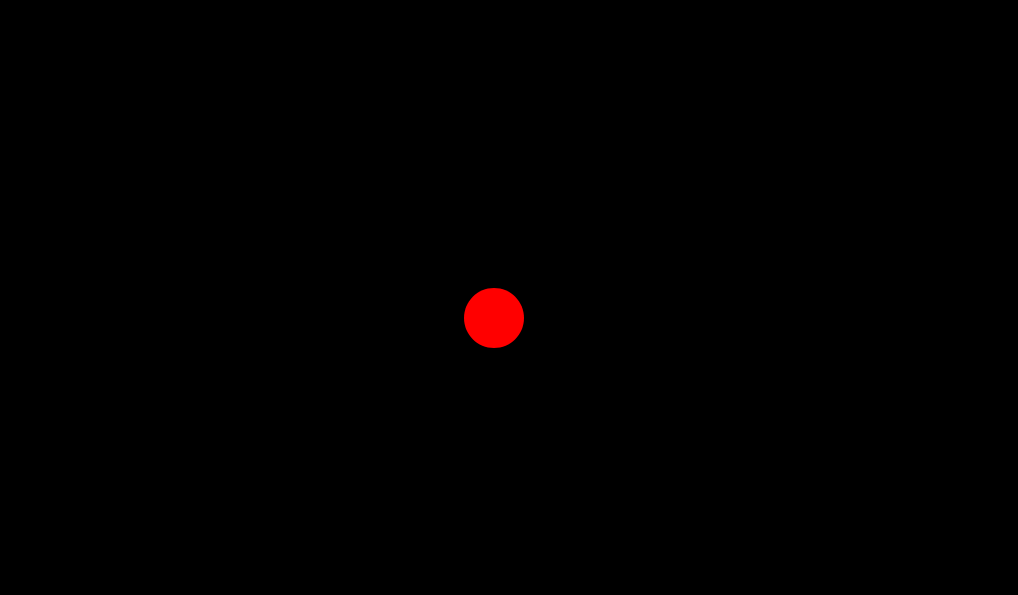
Ensuite, avec ce code, on dessine un disque rouge de 30px de rayon, dans notre canvas, c'est notre joueur :
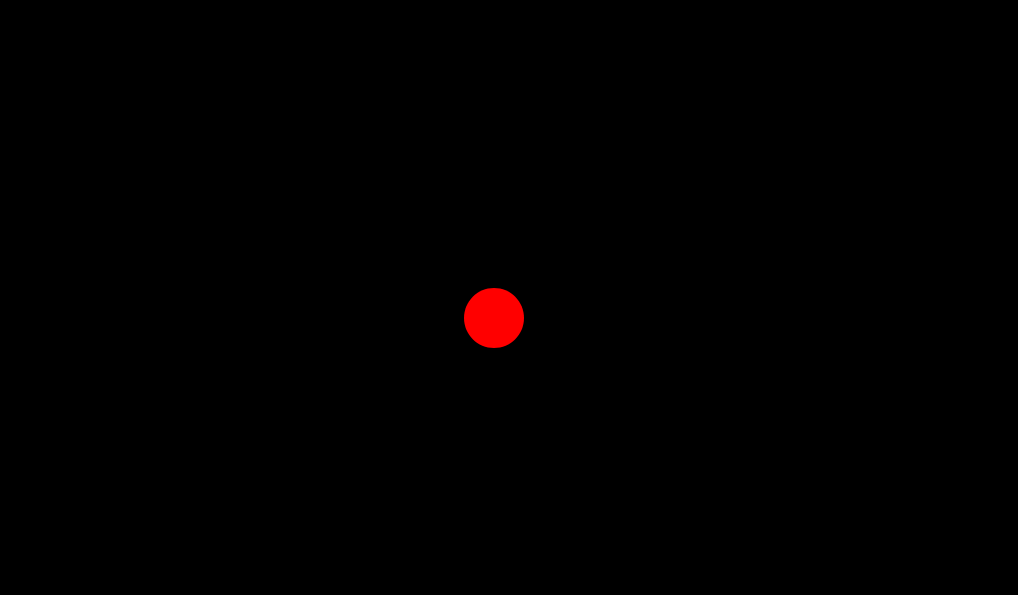 Mais on veut que le joueur interagisse avec d'autres éléments dans le canvas, on a besoin de transformer ça en créant une
class Entity puis une class Player.
À faire
- [ ] Créer la
class Entity - [ ] Dans le constructor, on a besoin de coordonnées
xetyet d'unradius - [ ] définir la propriété
colorà "red" - [ ] Créer une méthode
drawpour dessiner le disque dans le canvas, avec toutes les propriétés - [ ] Créer la
class Playerqui hérite de laclass Entity - [ ] Dans le constructor, on a besoin de coordonnées
xety, d'unradiusvenant du constructor deEntityet d'unecolor - [ ] Créer notre
playeravec cette classe et ledessinerau centre du canvas
class Entity {
    constructor(x, y, radius) {
        this.x = x;
        this.y = y;
        this.radius = radius;
        this.color = "red";
    }

    draw() {
        ctx.beginPath();
        ctx.arc(this.x, this.y, this.radius, 0, Math.PI * 2, false);
        ctx.fillStyle = this.color;
        ctx.fill();
    }
}

class Player extends Entity{
    constructor(x, y, radius, color) {
        super(x, y, radius);
        this.color = color;
    }
}

const player = new Player(canvas.width / 2, canvas.height / 2, 10, "red");
player.draw();
Récupérer le context du canvas afin de dessiner dedans.
Étape 3 - Tirer des projectiles depuis le joueur
Dans cette étape, on va créer la class Projectile pour dessiner des disques blancs qui vont se déplacer du joueur vers l'extérieur de l'écran, en direction du curseur de la souris, quand on clique sur l'écran.
D'abord, on a besoin de créer la class Projectile avec les mêmes propriétés que la class Player et une propriété de plus, velocity (vélocité).
La velocity sera un objet avec des propriétés x et y. La velocity est une vitesse et une direction.
À faire
- [ ] Créer la
class Projectilequi hérite de laclass Player - [ ] Dans le constructor, on a besoin de coordonnées
xety, d'unradiuset d'unecolorvenant de laclass Player, mais aussi d'une nouvelle propriétévelocity - [ ] Tester cette nouvelle
classen créant unprojectileavec unevelocityde ton choix
class Projectile extends Player {
    constructor(x, y, radius, color, velocity) {
        super(x, y, radius, color);
        this.velocity = velocity;
    }
}

const projectile = new Projectile(50, 50, 30, "blue", {x: 3, y: 3});
projectile.draw();
Ensuite, on veut ajouter un nouveau projectile à la position du curseur à chaque fois que l'utilisateur clique sur le canvas.
À faire
- [ ] Ajouter un
click event listener(écouteur d'événement de clic) sur la window - [ ] À chaque
click, créer un nouveauprojectileà la position du curseur, un rayon de 5px et une couleur blanche, tu peux accéder à la position du curseur dans les propriétés clientX et clientY de l'événement. N'oublie pas d'appeler la méthode draw du projectile pour l'ajouter dans le canvas - [ ] Ajouter ce nouveau projectile dans notre array (tableau)
projectiles, pour garder une référence vers tous les projectiles qu'on crée.
const projectiles = [];

window.addEventListener("click", (event) => {
    const projectile = new Projectile(event.clientX, event.clientY, 5, "white", null);
    projectile.draw();
    projectiles.push(projectile);
});
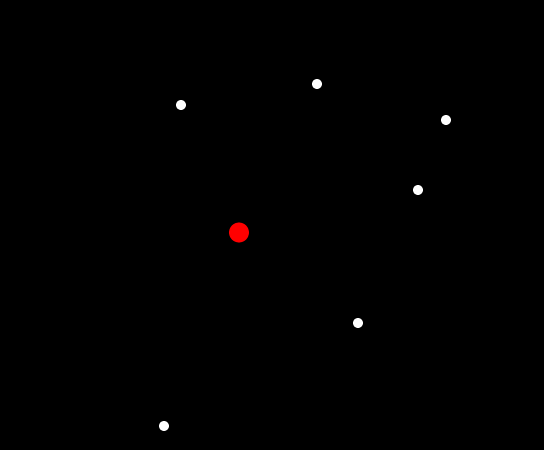 Maintenant, on peut ajouter des projectiles dans le canvas, là où on a cliqué sur l'écran.
Mais on veut que les projectiles se déplacent depuis le joueur en direction du curseur vers l'extérieur de l'écran.
Pour faire ça, on a besoin d'utiliser la trigonométrie pour transformer la position du curseur en une direction pour notre projectile. Regardons ça avec un petit schéma :
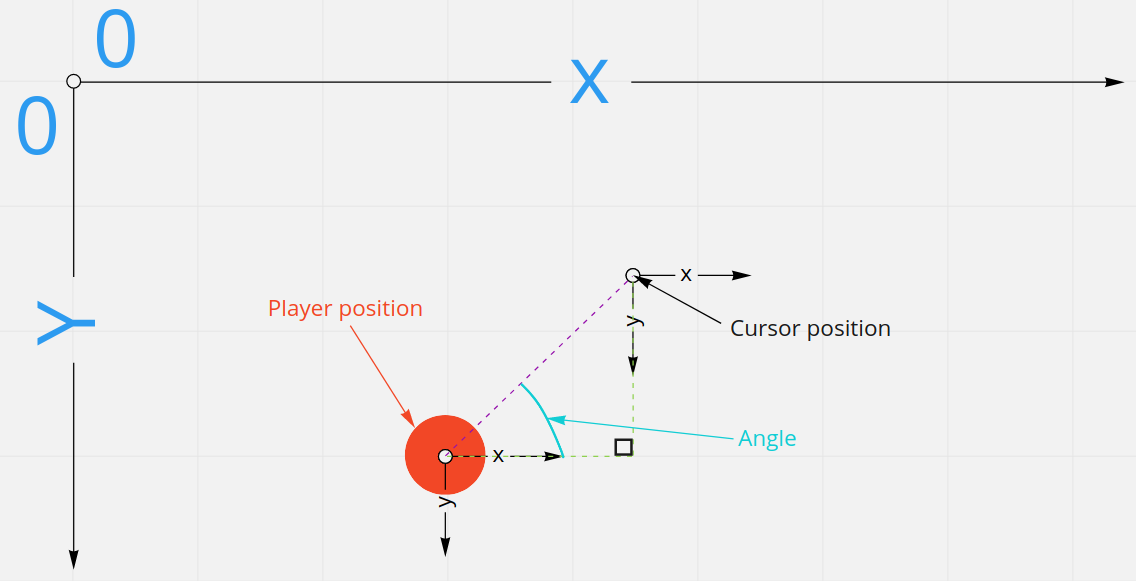 On a besoin de récupérer l'angle entre le joueur et la position du curseur, à l'aide de cette formule :
tan(angle) = (cursor.y - player.y) / (cursor.x - player.x)
angle = atan2((cursor.y - player.y) / (cursor.x -player.x))
On a accès à plusieurs méthodes mathématiques en JS, grâce à la classe native Math. On peut accéder à la position du curseur dans event.clientX et event.clientY, la position du joueur est dans player.x et player.y, avec ça, on peut obtenir l'angle qu'on cherche. Cet angle sera en radians :
const angle = Math.atan2(
        event.clientY - player.y,
        event.clientX - player.x
    );
Avec cet angle et une speed (vitesse) qu'on peut choisir (par exemple 5), on peut donner une velocity à notre projectile, comme ça :
const projectiles = [];

window.addEventListener("click", (event) => {
    const angle = Math.atan2(
        event.clientY - player.y,
        event.clientX - player.x
    );
    const velocity = {
        x: Math.cos(angle) * 5,
        y: Math.sin(angle) * 5,
    };

    const projectile = new Projectile(
        player.x,
        player.y,
        5,
        "white",
        velocity
    );
    projectiles.push(projectile);
    projectile.draw();
});
Pour l'instant, on dessine un nouveau projectile sur le joueur suite à un clic sur l'écran, mais on n'a aucune animation donc les projectiles ne bougent pas.
On a besoin d'une boucle d'animation pour mettre à jour le canvas et dessiner les projectiles à leurs nouvelles positions, en utilisant une fonction animate.
La class Projectile a besoin d'une nouvelle méthode update pour dessiner le projectile puis ajouter la velocity à la position du projectile.
class Projectile extends Player {
    constructor(x, y, radius, color, velocity) {
        super(x, y, radius, color);
        this.velocity = velocity;
    }

    update() {
        this.draw();
        this.x = this.x + this.velocity.x;
        this.y = this.y + this.velocity.y;
    }
}
Dans la fonction animate, on appelle la méthode requestAnimationFrame et on lui passe animate en argument, afin de dire au navigateur qu'on veut exécuter une animation.
Toujours dans la fonction animate, on veut mettre à jour tous les projectiles qu'on a dans l'array projectiles.
Mais avec cette méthode, on dessine tous les projectiles à leurs positions respectives, comme si tous les projectiles dessinaient leur trace sur l'écran. Ce n'est pas ce qu'on veut. Pour éviter ça, on a besoin de remplir le canvas avec un rectangle avant de dessiner le joueur et les projectiles, afin de pouvoir effacer tout l'écran avant chaque mise à jour.
function animate() {
    requestAnimationFrame(animate);

    ctx.fillStyle = "rgba(0, 0, 0, 1)";
    ctx.fillRect(0, 0, canvas.width, canvas.height);

    player.draw();

    projectiles.forEach((projectile) => projectile.update());
}
animate();
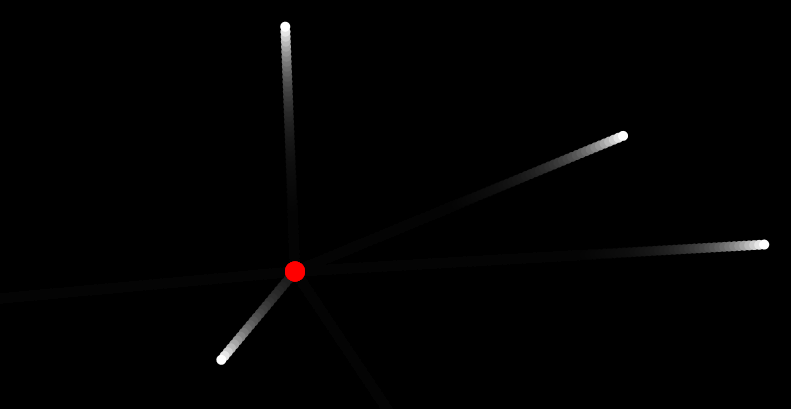
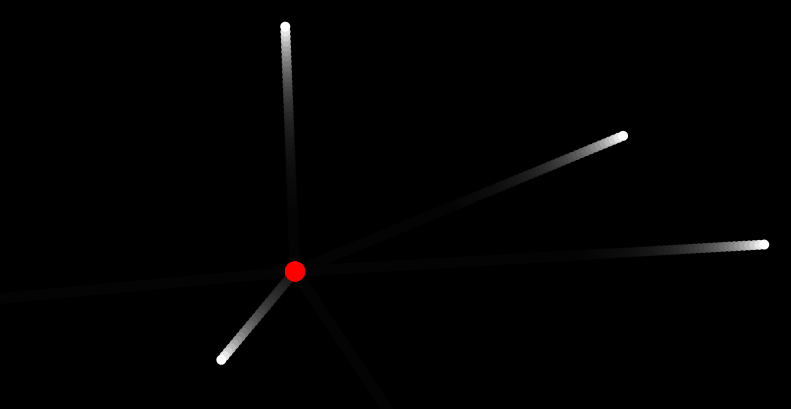
Pour avoir un bel effet sur chaque projectile, on peut changer la valeur alpha de la propriété fillStyle rgba à 0.1.
Étape 4 - Dessiner des ennemis allant de l'extérieur de l'écran vers la position du joueur
Le but de cette étape est de créer une classe Enemy pour dessiner des disques de couleur aléatoire qui vont se déplacer de l'extérieur de l'écran vers la position du joueur.
D'abord, on a besoin de créer la class Enemy avec les mêmes propriétés que celles qu'on trouve dans la class Projectile.
À faire
- [ ] Créer la
class Enemyqui hérite de laclass Projectile - [ ] Dans le constructor, on a besoin de coordonnées
xety, d'unradius, d'unecoloret d'unevelocity - [ ] Tester cette nouvelle classe en créant un ennemi avec une velocity de x = -1, y = -1
- [ ] Créer un array d'ennemis et y mettre quelques ennemis avec une position aléatoire
- [ ] dans la
fonction animate, mettre à jour lesenemiescomme pour lesprojectiles
class Enemy extends Projectile {
    constructor(x, y, radius, color, velocity) {
        super(x, y, radius, color, velocity);
    }
}

const player = new Player(canvas.width / 2, canvas.height / 2, 10, "blue");

const projectiles = [];

const enemies = [];

function animate() {
    requestAnimationFrame(animate);

    ctx.fillStyle = "rgba(0, 0, 0, 0.1)";
    ctx.fillRect(0, 0, canvas.width, canvas.height);

    player.draw();

    projectiles.forEach((projectile) => projectile.update());

    enemies.forEach((enemy) => enemy.update());
}
animate();
Ensuite, maintenant on veut créer des ennemis avec un radius aléatoire, une color aléatoire et une position aléatoire depuis l'extérieur de l'écran, on peut créer une fonction spawnEnemies pour faire ça.
À faire
Dans la fonction spawnEnemies :
- [ ] Créer un
radiusaléatoire entre 4 et 30 - [ ] Créer une
coloraléatoire en hsl, en rgb ou en hex
Pour la position de l'ennemi, on veut 25% de chance d'avoir un ennemi qui vient de la gauche, 25% de la droite, 25% du haut et 25% du bas. On peut faire ça avec un nombre aléatoire, si sa valeur est inférieure à 0.25, on met la valeur x à 0 - le radius et la valeur y entre 0 et la hauteur du canvas, ces valeurs x et y nous donnent un ennemi qui vient de la gauche de l'écran. Pour un ennemi qui vient de la droite, on choisit une valeur du nombre aléatoire entre 0.25 et 0.5, on met la valeur x à la largeur du canvas et la valeur y entre 0 et la hauteur du canvas, ce sera le même principe pour les ennemis du haut et du bas.
function spawnEnemies() {
    const radius = Math.random() * (30 - 4) + 4;

    const r = Math.floor(Math.random() * 256);
    const g = Math.floor(Math.random() * 256);
    const b = Math.floor(Math.random() * 256);
    const color = `rgb(${r}, ${g}, ${b})`;

    const randomValue = Math.random();
    let x ,y;
    if (randomValue < 0.25) {
        x = 0 - radius;
        y = Math.random() * canvas.height;
    } else if (randomValue >= 0.25 && randomValue < 0.5) {
        x = canvas.width + radius;
        y = Math.random() * canvas.height;
    } else if (randomValue >= 0.5 && randomValue < 0.75) {
        x = Math.random() * canvas.width;
        y = 0 - radius;
    } else if (randomValue >= 0.75) {
        x = Math.random() * canvas.width;
        y = canvas.height + radius;
    }
}
spawnEnemies();
Maintenant, on a besoin d'une velocity pour déplacer un ennemi de sa position vers le joueur.
À faire
- [ ] Calculer l'
angleentre leplayeret l'enemy - [ ] Calculer la
velocityavec cetangle - [ ] Ajouter un nouvel
Enemyavec toutes ces propriétés à l'arrayenemies - [ ] On peut mettre tout le code de la fonction
spawnEnemiesdans une fonction setInterval pour créer unenemychaque seconde - [ ] Appeler la fonction
spawnEnemiesaprès l'appel de la fonctionanimate
function spawnEnemies() {
    setInterval(() => {
        const radius = Math.random() * (30 - 4) + 4;

        const r = Math.floor(Math.random() * 256);
        const g = Math.floor(Math.random() * 256);
        const b = Math.floor(Math.random() * 256);
        const color = `rgb(${r}, ${g}, ${b})`;

        const randomValue = Math.random();
        let x ,y;
        if (randomValue < 0.25) {
            x = 0 - radius;
            y = Math.random() * canvas.height;
        } else if (randomValue >= 0.25 && randomValue < 0.5) {
            x = canvas.width + radius;
            y = Math.random() * canvas.height;
        } else if (randomValue >= 0.5 && randomValue < 0.75) {
            x = Math.random() * canvas.width;
            y = 0 - radius;
        } else if (randomValue >= 0.75) {
            x = Math.random() * canvas.width;
            y = canvas.height + radius;
        }

        const angle = Math.atan2(player.y - y, player.x - x);
        const velocity = {
            x: Math.cos(angle),
            y: Math.sin(angle),
        };

        enemies.push(new Enemy(x, y, radius, color, velocity));
    }, 1000);
}
spawnEnemies();
Étape 5 - Détecter les collisions
Super, on a des ennemis et des projectiles, mais on veut retirer de l'écran tous les ennemis touchés par un projectile, et si un projectile a touché un ennemi, ce projectile est retiré de l'écran.
Dans la fonction animate, là où on met à jour chaque ennemi, on peut vérifier si un projectile est trop proche d'un ennemi. Ça s'appelle la collision detection (détection de collision).
On a besoin de vérifier si la distance entre le projectile et l'enemy, moins le rayon de chacun, est inférieure ou égale à 0.
La méthode Math.hypot peut calculer la distance entre deux points.
Si la condition est vraie, on veut retirer le projectile et l'ennemi des arrays projectiles et enemies.
À faire
- [ ] Dans
enemies.forEach, itérer à travers l'arrayprojectiles - [ ] Créer la variable
distanceavec la méthode Math.hypot - [ ] Si la distance moins le rayon de l'ennemi et moins le rayon du projectile est inférieure ou égale à 0,
retirerle projectile et l'ennemi de leur array
enemies.forEach((enemy, enemyIndex) => {
  projectiles.forEach((projectile, projectileIndex) => {
    const distance = Math.hypot(projectile.x - enemy.x, projectile.y - enemy.y);
      if (distance - projectile.radius - enemy.radius <= 0) {
         enemies.splice(enemyIndex, 1);
         projectiles.splice(projectileIndex, 1);
      }
    })
  enemy.update();
});
On a besoin de détecter la collision entre notre joueur et les ennemis, et d'arrêter le jeu. On peut utiliser cancelAnimationFrame avec l'animationId fourni par requestAnimationFrame pour arrêter l'animation.
À faire
- [ ] Dans
enemies.forEach dans la fonctionanimate, récupérer ladistanceentre leplayeret unenemy - [ ] Si la distance moins le rayon de l'ennemi et moins le rayon du joueur est inférieure ou égale à 0, arrêter le jeu
let animationId;
function animate() {
  animationId = requestAnimationFrame(animate);

  ctx.fillStyle = "rgba(0, 0, 0, 0.1)";
  ctx.fillRect(0, 0, canvas.width, canvas.height);

  player.draw();

  projectiles.forEach((projectile) => projectile.update());

  enemies.forEach((enemy, enemyIndex) => {
    projectiles.forEach((projectile, projectileIndex) => {
      const distance = Math.hypot(
        projectile.x - enemy.x,
        projectile.y - enemy.y
      );
      if (distance - projectile.radius - enemy.radius <= 0) {
        console.log("touched");
        setTimeout(() => {
          enemies.splice(enemyIndex, 1);
          projectiles.splice(projectileIndex, 1);
        }, 0);
      }
    });

    const distPlayerEnemy = Math.hypot(player.x - enemy.x, player.y - enemy.y);
    if (distPlayerEnemy - enemy.radius - player.radius <= 0) {
        cancelAnimationFrame(animationId);
    }

    enemy.update();

  });
}
animate();
Étape 6 - Retirer les projectiles sortis de l'écran
Dans projectiles.forEach, détecter si le projectile est en dehors de l'écran et le retirer de l'array projectiles.
À faire
- [ ] Vérifier si projectile.x est inférieur à 0 ou supérieur à canvas.width ou si projectile.y est inférieur à 0 ou supérieur à canvas.height (intègre le rayon du projectile) et le retirer
projectiles.forEach((projectile, index) => {
    if (
      projectile.x - projectile.radius < 0 ||
      projectile.x + projectile.radius > canvas.width ||
      projectile.y - projectile.radius < 0 ||
      projectile.y + projectile.radius > canvas.height
    ) {
      projectiles.splice(index, 1);
    }
    projectile.update();
});
Étape 7 - Réduire la taille d'un ennemi touché par un projectile
Au lieu de retirer un ennemi touché par un projectile, on va réduire sa size (taille).
Dans la détection de collision entre projectile et ennemi, on ajoute une instruction if...else.
À faire
- [ ] Si le rayon de l'ennemi moins 10 est supérieur à 5,
réduirelerayon de l'ennemide 10,retirerle projectile - [ ] Sinon
retirerle projectile et l'ennemi
let animationId;
function animate() {
  animationId = requestAnimationFrame(animate);

  ctx.fillStyle = "rgba(0, 0, 0, 0.1)";
  ctx.fillRect(0, 0, canvas.width, canvas.height);

  player.draw();

  projectiles.forEach((projectile) => projectile.update());

  enemies.forEach((enemy, enemyIndex) => {
    projectiles.forEach((projectile, projectileIndex) => {
      const distance = Math.hypot(
        projectile.x - enemy.x,
        projectile.y - enemy.y
      );
      if (distance - projectile.radius - enemy.radius <= 0) {
        if (enemy.radius - 10 > 5) {
          enemy.radius -= 10;
          setTimeout(() => {
            projectiles.splice(projectileIndex, 1);
          }, 0);
        } else {
          setTimeout(() => {
            enemies.splice(enemyIndex, 1);
            projectiles.splice(projectileIndex, 1);
          }, 0);
        }
      }
    });

    const distPlayerEnemy = Math.hypot(player.x - enemy.x, player.y - enemy.y);
    if (distPlayerEnemy - enemy.radius - player.radius <= 0) {
        cancelAnimationFrame(animationId);
    }

    enemy.update();

  });
}
animate();
Le redimensionnement d'un ennemi va trop vite, on peut utiliser une bibliothèque appelée GSAP pour rendre ce redimensionnement plus fluide.
À faire
- [ ] Dans
index.html, ajouter la bibliothèque GSAP avec cette balise script juste avant la balise script deindex.js - [ ] Dans
index.js, remplacerenemy.radius -= 10;par ce code
gsap.to(enemy, {
  radius: enemy.radius - 10,
});
Étape 8 - Créer des particules quand un projectile touche un ennemi
D'abord, on a besoin d'une classe Particle qui hérite de Enemy, avec une propriété alpha, des méthodes draw et update spécifiques qui utilisent cette propriété alpha.
À faire
- [ ] Créer la
class Particlequi hérite de laclass Enemy - [ ] Dans le constructor, on a besoin de coordonnées
xety, d'unradius, d'unecolor, d'unevelocityvenant de laclass Enemy, mais aussi d'une nouvelle propriétéalpha - [ ] Créer de nouvelles méthodes
drawetupdateavec ces modifications
class Particle extends Enemy {
  constructor(x, y, radius, color, velocity) {
    super(x, y, radius, color, velocity);
    this.alpha = 1;
  }

  draw() {
    ctx.save();
    ctx.globalAlpha = this.alpha;
    ctx.beginPath();
    ctx.arc(this.x, this.y, this.radius, 0, Math.PI * 2, false);
    ctx.fillStyle = this.color;
    ctx.fill();
    ctx.restore();
  }

  update() {
    this.draw();
    this.x = this.x + this.velocity.x;
    this.y = this.y + this.velocity.y;
    this.alpha -= 0.01;
  }
}
Avec cette class Particle, on peut créer 8 particules ou plus quand un projectile touche un ennemi, et on ajoute ces particules à un array particles.
À faire
Vérifier si un projectile a touché un ennemi
- [ ] Faire une
boucle forde 8 itérations ou plus
Dans cette boucle, push (ajouter) une nouvelle Particle dans l'array particles, avec ces arguments
- [ ] x et y sont égaux à projectile.x et projectile.y
- [ ] le radius est une valeur aléatoire entre 3 et 1
- [ ] la color est la couleur de l'ennemi
- [ ] la velocity, x et y sont des valeurs aléatoires, positives ou négatives
Dans la fonction animate après player.draw()
- [ ] Parcourir toutes les particules pour retirer une particule dont la propriété alpha est inférieure ou égale à 0 et mettre à jour les particules
player.draw();

particles.forEach((particle, index) => {
  if (particle.alpha <= 0) {
    particles.splice(index, 1);
  } else {
    particle.update();
  }
});

enemies.forEach((enemy, enemyIndex) => {

    projectiles.forEach((projectile, projectileIndex) => {
      const distance = Math.hypot(
        projectile.x - enemy.x,
        projectile.y - enemy.y
      );
      if (distance - projectile.radius - enemy.radius <= 0) {
        // particles creation
        for (let i = 0; i < 8; i++) {
          particles.push(
            new Particle(
              projectile.x,
              projectile.y,
              Math.random() * (3 - 1) + 1,
              enemy.color,
              {
                x: (Math.random() - 0.5) * 3,
                y: (Math.random() - 0.5) * 3,
              }
            )
          );
        }

        if (enemy.radius - 10 > 5) {
          gsap.to(enemy, {
            radius: enemy.radius - 10,
          });
          setTimeout(() => {
            projectiles.splice(projectileIndex, 1);
          }, 0);
        } else {
          setTimeout(() => {
            enemies.splice(enemyIndex, 1);
            projectiles.splice(projectileIndex, 1);
          }, 0);
        }
      }
    });

    const distPlayerEnemy = Math.hypot(player.x - enemy.x, player.y - enemy.y);
    if (distPlayerEnemy - enemy.radius - player.radius <= 0) {
      cancelAnimationFrame(animationId);
    }
    enemy.update();
  });
}
Bonus - UI
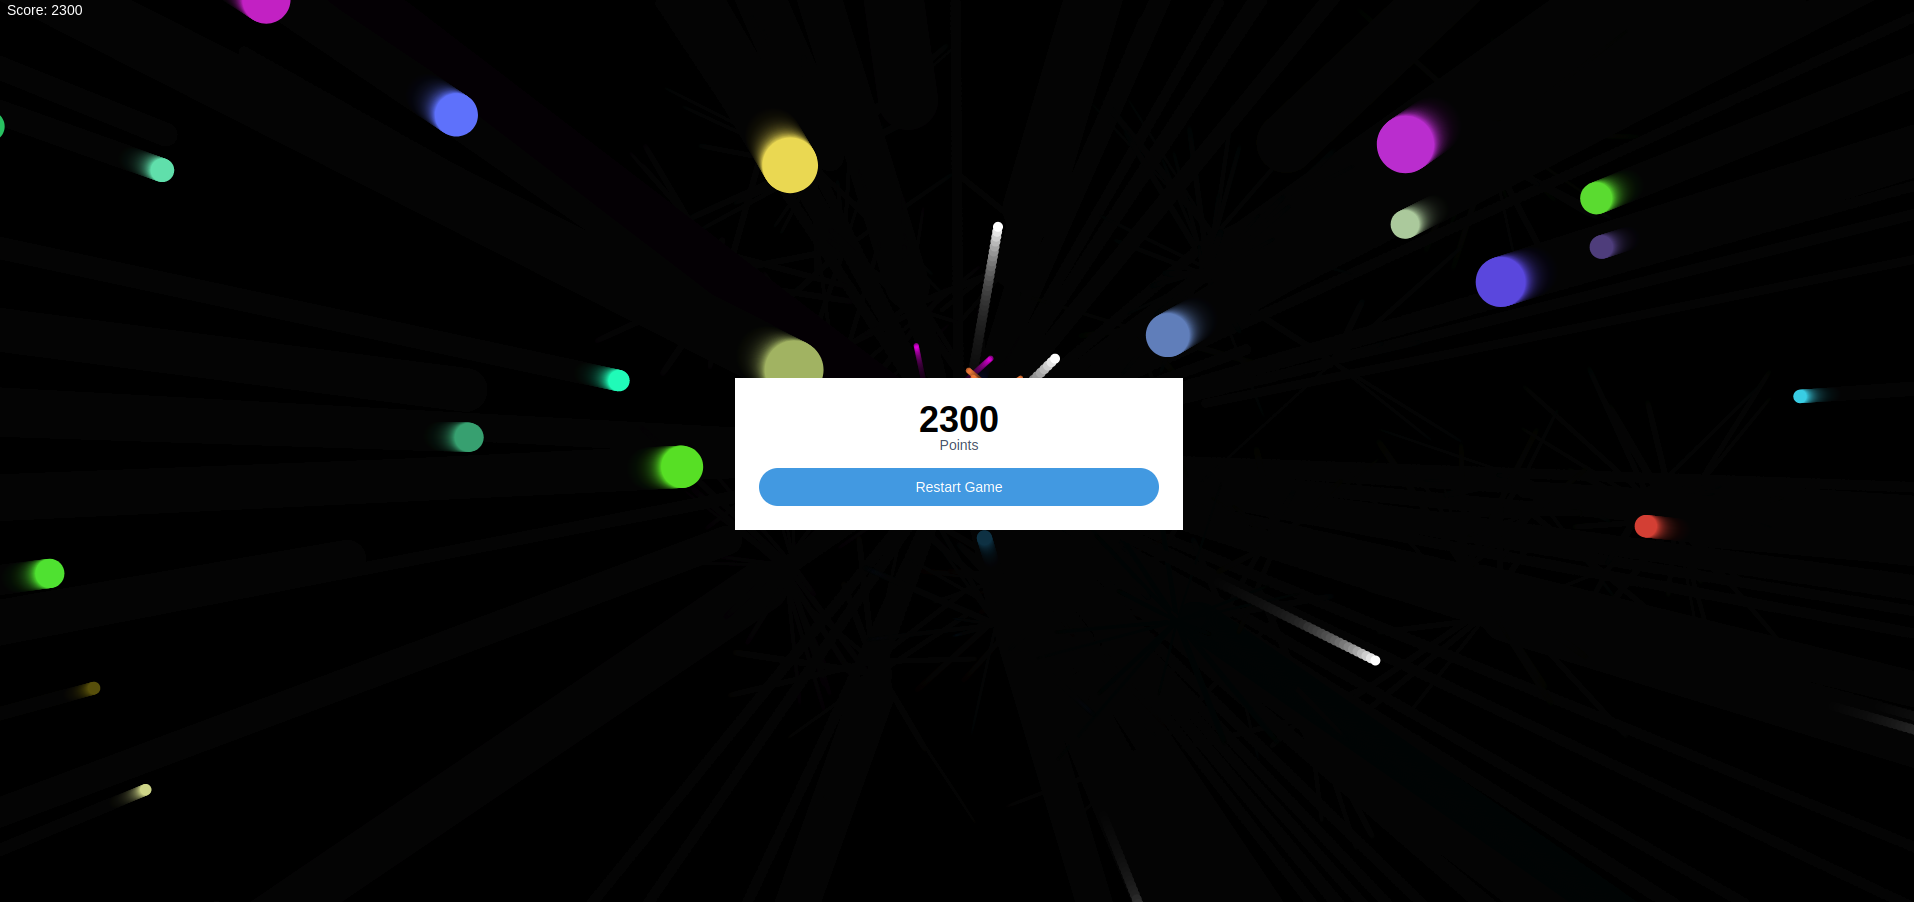
Tu peux ajouter une modal (fenêtre modale) pour démarrer ou relancer le jeu, ajouter un score....
Tu peux trouver dans ce lien une solution complète de ce jeu.
Introduction Challenge
⚠️ Before starting this exercise, you must have finished some of the JavaScript quests
💪 Challenge
Let's build a game!
At the end of this challenge, we hope you will notice how the classes and the objects can be useful in JavaScript, and how powerful the concept of Object-Oriented Programming is in programming.
The aim of this challenge is to build a shooting game in your web navigator.
 For this challenge, we will learn how to use the canvas tag, in order to draw inside.
Step 1 - Start our project
The first step is to prepare our files inside our project folder.
Files:
- index.html
- index.js
- style.css
Todo
- [ ] Create the 3 files
- [ ] Inside
index.htmladd the basic structure of an html file - [ ] Link
style.csstoindex.html - [ ] Add a
<script>inside the<body>element, to linkindex.jswithindex.html - [ ] Add a
<canvas>element inside the<body>element, with an idgame-container(see the links just below for more explanations about the canvas element) - [ ] Inside
index.js, create a variable named "canvas" and assign it the DOM element with the id game-container. - [ ] With the properties
innerWidthandinnerHeightof thewindowobject, change thewidthandheightof thecanvasto take all available space in the browser's window.
Explanations about the canvas tag.
How to use the canvas tag.
<!DOCTYPE html>
<html lang="en">
    <head>
        <meta charset="UTF-8" />
        <meta http-equiv="X-UA-Compatible" content="IE=edge" />
        <meta name="viewport" content="width=device-width, initial-scale=1.0" />
        <title>JS Game with OOP</title>
        <link rel="stylesheet" href="style.css" />
    </head>
    <body>
        <canvas id="game-container"></canvas>
        <script src="index.js"></script>
    </body>
</html>
const canvas = document.querySelector("#game-container");

canvas.width = innerWidth;
canvas.height = innerHeight;
* {
    margin: 0;
    padding: 0;
}

body {
    background-color: black;
    overflow: hidden;
}
Step 2 - Create a player
This step is to create a player represented as a disc inside the canvas.
First, we need to get the context of the canvas, through this context, we will be able to draw in the canvas with the help of the Canvas API.
const ctx = canvas.getContext('2d');
We can draw any shape we want, like a disc, with this syntaxe:
ctx.beginPath();
ctx.arc(x, y, radius, start angle, end angle, anticlockwise);
ctx.fillStyle = color;
ctx.fill();
In the arc method, x and y are the coordinates of the center of the disc inside the canvas.
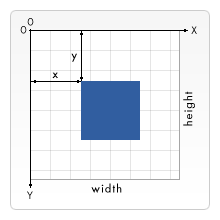 fillStyle property and fill method allows us to fill the arc with a color and the arc become a disc.
const canvas = document.querySelector("#game-container");
const ctx = canvas.getContext("2d");

canvas.width = innerWidth;
canvas.height = innerHeight;

ctx.beginPath();
ctx.arc(canvas.width / 2, canvas.height / 2, 30, 0, Math.PI * 2, false);
ctx.fillStyle = "red";
ctx.fill();
Secondly, with this code, we draw a red disc of 30px radius, inside our canvas, it's our player:
 But we want the player to interacte with other elements inside the canvas, we need to transform this by creating a
class Entity and then a class Player.
Todo
- [ ] Create the
class Entity - [ ] In the constructor, we need a
xand aycoordinates and aradius - [ ] define the
colorproperty to "red" - [ ] Create a
drawmethod to draw the disc in the canvas, with all the properties - [ ] Create the
class Playerwhich extends from theclass Entity - [ ] In the constructor, we need a
xand aycoordinates, aradiusfrom theEntityconstructor and acolor - [ ] Create our
playerwith this class anddraw itin the center of the canvas
class Entity {
    constructor(x, y, radius) {
        this.x = x;
        this.y = y;
        this.radius = radius;
        this.color = "red";
    }

    draw() {
        ctx.beginPath();
        ctx.arc(this.x, this.y, this.radius, 0, Math.PI * 2, false);
        ctx.fillStyle = this.color;
        ctx.fill();
    }
}

class Player extends Entity{
    constructor(x, y, radius, color) {
        super(x, y, radius);
        this.color = color;
    }
}

const player = new Player(canvas.width / 2, canvas.height / 2, 10, "red");
player.draw();
Get the context of the canvas in order to draw in it.
Step 3 - Shoot projectiles from the player
In this step we'll create the class Projectile to draw white discs which will move from the player to oustside of the screen, in direction of the mouse cursor, when we click on the screen.
First we need to create the class Projectile with the same properties that the class Player and one more property velocity.
The velocity will be an object with a x and y properties. Velocity is a speed and a direction.
Todo
- [ ] Create the
class Projectilewhich extends of theclass Player - [ ] In the constructor, we need a
xand aycoordinates, aradiusand acolorfrom theclass Player, but also a new propertyvelocity - [ ] Test this new
classby creating oneprojectilewith avelocityof your choice
class Projectile extends Player {
    constructor(x, y, radius, color, velocity) {
        super(x, y, radius, color);
        this.velocity = velocity;
    }
}

const projectile = new Projectile(50, 50, 30, "blue", {x: 3, y: 3});
projectile.draw();
Secondly, we want to add a new projectile at the position of the cursor every time the user clicks on the canvas.
Todo
- [ ] Add a
click event listeneron the window - [ ] On every
click, create a newprojectileat the position of the cursor, radius of 5px and white color, you can access the cursor position in the clientX and clientY properties of the event. Don't forget to call the draw method of the projectile to add it in the canvas - [ ] Add this new projectile in our
projectilesarray, to keep a reference to all the projectiles we create.
const projectiles = [];

window.addEventListener("click", (event) => {
    const projectile = new Projectile(event.clientX, event.clientY, 5, "white", null);
    projectile.draw();
    projectiles.push(projectile);
});
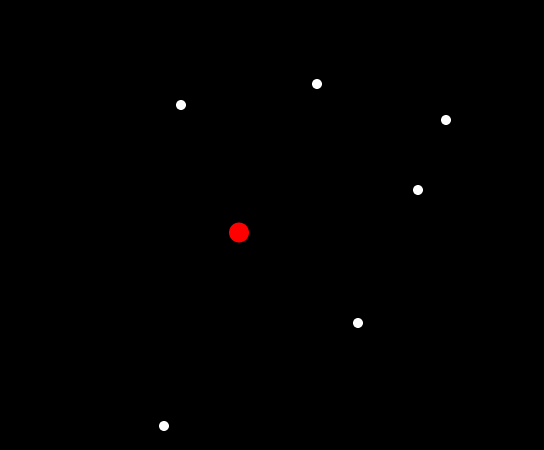 Now, we can add some projectiles in the canvas, where we clicked on the screen.
But we want the projectiles move from the player in the direction of the cursor towards the outside of the screen.
To do this, we need to use trigonometry to transform the cursor position into a direction for our projectile. Let's look at this with a little diagram:
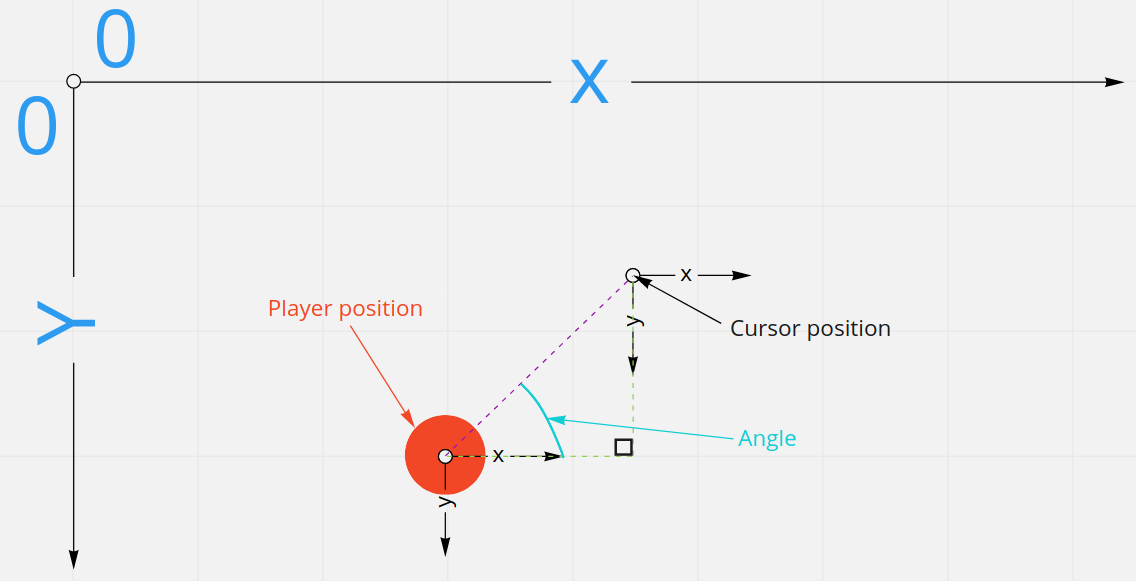 We need to get the angle between the player and the cursor position, with the help of this formula:
tan(angle) = (cursor.y - player.y) / (cursor.x - player.x)
angle = atan2((cursor.y - player.y) / (cursor.x -player.x))
We have access to multiple mathematical methods in JS, thanks to the native Math class. We can access the cursor position in event.clientX and event.clientY, the player position is in player.x and player.y, with these, we can get the angle we are looking for. This angle will be in radians:
const angle = Math.atan2(
        event.clientY - player.y,
        event.clientX - player.x
    );
With this angle and a speed we can choose (for example 5), we can give a velocity to our projectile, like this:
const projectiles = [];

window.addEventListener("click", (event) => {
    const angle = Math.atan2(
        event.clientY - player.y,
        event.clientX - player.x
    );
    const velocity = {
        x: Math.cos(angle) * 5,
        y: Math.sin(angle) * 5,
    };

    const projectile = new Projectile(
        player.x,
        player.y,
        5,
        "white",
        velocity
    );
    projectiles.push(projectile);
    projectile.draw();
});
For now, we draw a new projectile on the player following a click in the screen, but we don't have any animation so the projectiles are not moving.
We need an animation loop to update the canvas and draw the projectiles on their new positions, by using an animate function.
The class Projectile needs a new update method to draw the projectile and then add the velocity to the position of the projectile.
class Projectile extends Player {
    constructor(x, y, radius, color, velocity) {
        super(x, y, radius, color);
        this.velocity = velocity;
    }

    update() {
        this.draw();
        this.x = this.x + this.velocity.x;
        this.y = this.y + this.velocity.y;
    }
}
Inside the animate function, we call the requestAnimationFrame method and past it animate in argument, in order to say to the navigator that we want to execute an animation.
Also inside animate function, we want to update all the projectiles we have in the projectiles array.
But with this method, we draw all the projectiles at their respective positions, like if all projectiles would draw their trace on the screen. It's not what we want. To avoid this, we need to fill the canvas with a rectangle before drawing the player and the projectiles, so that we can clear the entire screen before each update.
function animate() {
    requestAnimationFrame(animate);

    ctx.fillStyle = "rgba(0, 0, 0, 1)";
    ctx.fillRect(0, 0, canvas.width, canvas.height);

    player.draw();

    projectiles.forEach((projectile) => projectile.update());
}
animate();
To have a nice effect on each projectile, we can change the alpha value of the rgba fillStyle property to 0.1.
Step 4 - Draw enemies going from outside of the screen to the player's position
The goal of this step is to create an Enemy class to draw random color discs which will move from outside of the screen to the player's position.
First we need to create the class Enemy with the same properties that we can find in the class Projectile.
Todo
- [ ] Create the
class Enemywhich extends theclass Projectile - [ ] In the constructor, we need a
xand aycoordinates, aradius, acolorand avelocity - [ ] Test this new class by creating one enemy with a velocity of x = -1, y = -1
- [ ] Create an array of enemies and put inside some enemies with a random position
- [ ] in the
animate function, update theenemieslike for theprojectiles
class Enemy extends Projectile {
    constructor(x, y, radius, color, velocity) {
        super(x, y, radius, color, velocity);
    }
}

const player = new Player(canvas.width / 2, canvas.height / 2, 10, "blue");

const projectiles = [];

const enemies = [];

function animate() {
    requestAnimationFrame(animate);

    ctx.fillStyle = "rgba(0, 0, 0, 0.1)";
    ctx.fillRect(0, 0, canvas.width, canvas.height);

    player.draw();

    projectiles.forEach((projectile) => projectile.update());

    enemies.forEach((enemy) => enemy.update());
}
animate();
Secondly, now we want to create enemies with a random radius, a random color and a random position from outside of the screen, we can create a spawnEnemies function to do this.
Todo
Inside the spawnEnemies function:
- [ ] Create a random
radiusbetween 4 and 30 - [ ] Create a random hsl
color, rgbcoloror hexcolor
For the position of the enemy, we want 25% of chance to have an enemy come from the left, 25% from the right, 25% from the top and 25% from the bottom. We can do this with a random number, if his value is less than 0.25, we put the x value to 0 - the radius and y value between 0 and the height of the canvas, these x and y value give us an enemy come from the left of the screen. For an enemy come from the right, we choose the random number value between 0.25 and 0.5, we put the x value to the width of the canvas and y value between 0 and the height of the canvas, it will be the same principle for top and bottom enemy.
function spawnEnemies() {
    const radius = Math.random() * (30 - 4) + 4;

    const r = Math.floor(Math.random() * 256);
    const g = Math.floor(Math.random() * 256);
    const b = Math.floor(Math.random() * 256);
    const color = `rgb(${r}, ${g}, ${b})`;

    const randomValue = Math.random();
    let x ,y;
    if (randomValue < 0.25) {
        x = 0 - radius;
        y = Math.random() * canvas.height;
    } else if (randomValue >= 0.25 && randomValue < 0.5) {
        x = canvas.width + radius;
        y = Math.random() * canvas.height;
    } else if (randomValue >= 0.5 && randomValue < 0.75) {
        x = Math.random() * canvas.width;
        y = 0 - radius;
    } else if (randomValue >= 0.75) {
        x = Math.random() * canvas.width;
        y = canvas.height + radius;
    }
}
spawnEnemies();
Now, we need a velocity to move an enemy from his position to the player.
Todo
- [ ] Calculate the
anglebetween theplayerand theenemy - [ ] Caculate the
velocitywith thisangle - [ ] Add a new
Enemywith all these properties to theenemiesarray - [ ] We can put all the code inside the
spawnEnemiesfunction inside a setInterval function to create anenemyevery second - [ ] Call the
spawnEnemiesfunction after the call of theanimatefunction
function spawnEnemies() {
    setInterval(() => {
        const radius = Math.random() * (30 - 4) + 4;

        const r = Math.floor(Math.random() * 256);
        const g = Math.floor(Math.random() * 256);
        const b = Math.floor(Math.random() * 256);
        const color = `rgb(${r}, ${g}, ${b})`;

        const randomValue = Math.random();
        let x ,y;
        if (randomValue < 0.25) {
            x = 0 - radius;
            y = Math.random() * canvas.height;
        } else if (randomValue >= 0.25 && randomValue < 0.5) {
            x = canvas.width + radius;
            y = Math.random() * canvas.height;
        } else if (randomValue >= 0.5 && randomValue < 0.75) {
            x = Math.random() * canvas.width;
            y = 0 - radius;
        } else if (randomValue >= 0.75) {
            x = Math.random() * canvas.width;
            y = canvas.height + radius;
        }

        const angle = Math.atan2(player.y - y, player.x - x);
        const velocity = {
            x: Math.cos(angle),
            y: Math.sin(angle),
        };

        enemies.push(new Enemy(x, y, radius, color, velocity));
    }, 1000);
}
spawnEnemies();
Step 5 - Detect collisions
Great, we have enemies and projectiles, but we want to remove from the screen all the enemies touched by a projectile, and if a projectile touched an enemy, this projectile is removed from the screen.
Inside the animate function, where we update each enemies, we can check if a projectile is too close of an enemy. It's called collision detection.
We need to check if the distance between the projectile and the enemy, minus the radius of each, is less or equal to 0.
The method Math.hypot can calculate the distance between two points.
If the condition is true, we want to remove the projectile and the enemy from the projectiles and enemies arrays.
Todo
- [ ] Inside
enemies.forEach, iterate through theprojectilesarray - [ ] Create the variable
distancewith the Math.hypot method - [ ] If the distance minus the radius of the enemy and minus the radius of the projectile is less or equal to 0,
removethe projectile and the enemy from them array
enemies.forEach((enemy, enemyIndex) => {
  projectiles.forEach((projectile, projectileIndex) => {
    const distance = Math.hypot(projectile.x - enemy.x, projectile.y - enemy.y);
      if (distance - projectile.radius - enemy.radius <= 0) {
         enemies.splice(enemyIndex, 1);
         projectiles.splice(projectileIndex, 1);
      }
    })
  enemy.update();
});
We need to detect the collision between our player and the enemies, and stop the game. We can use cancelAnimationFrame with the animationId provide by the requestAnimationFrame to stop the animation.
Todo
- [ ] Inside
enemies.forEach inanimatefunction, get thedistancebetween theplayerand anenemy - [ ] If the distance minus the enemy radius and minus the player radius is less or equal to 0, stop the game
let animationId;
function animate() {
  animationId = requestAnimationFrame(animate);

  ctx.fillStyle = "rgba(0, 0, 0, 0.1)";
  ctx.fillRect(0, 0, canvas.width, canvas.height);

  player.draw();

  projectiles.forEach((projectile) => projectile.update());

  enemies.forEach((enemy, enemyIndex) => {
    projectiles.forEach((projectile, projectileIndex) => {
      const distance = Math.hypot(
        projectile.x - enemy.x,
        projectile.y - enemy.y
      );
      if (distance - projectile.radius - enemy.radius <= 0) {
        console.log("touched");
        setTimeout(() => {
          enemies.splice(enemyIndex, 1);
          projectiles.splice(projectileIndex, 1);
        }, 0);
      }
    });

    const distPlayerEnemy = Math.hypot(player.x - enemy.x, player.y - enemy.y);
    if (distPlayerEnemy - enemy.radius - player.radius <= 0) {
        cancelAnimationFrame(animationId);
    }

    enemy.update();

  });
}
animate();
Step 6 - Remove projectiles from outside of the screen
Inside projectiles.forEach, detect if the projectile is oustside of the screen and remove it from projectiles array.
Todo
- [ ] Check if projectile.x is less than 0 or greater than canvas.width or if projectile.y is less than 0 or greater than canvas.height (integrate the radius of the projectile) and remove it
projectiles.forEach((projectile, index) => {
    if (
      projectile.x - projectile.radius < 0 ||
      projectile.x + projectile.radius > canvas.width ||
      projectile.y - projectile.radius < 0 ||
      projectile.y + projectile.radius > canvas.height
    ) {
      projectiles.splice(index, 1);
    }
    projectile.update();
});
Step 7 - Reduce the size of an enemy hit by a projectile
Instead of remove an enemy hit by a projectile, we will reduce his size.
Inside the detection of collision between projectile and enemy, we add a if...else statement.
Todo
- [ ] If the enemy radius minus 10 is greater than 5,
reducetheenemy radiusof 10,removethe projectile - [ ] Else
removethe projectile and the enemy
let animationId;
function animate() {
  animationId = requestAnimationFrame(animate);

  ctx.fillStyle = "rgba(0, 0, 0, 0.1)";
  ctx.fillRect(0, 0, canvas.width, canvas.height);

  player.draw();

  projectiles.forEach((projectile) => projectile.update());

  enemies.forEach((enemy, enemyIndex) => {
    projectiles.forEach((projectile, projectileIndex) => {
      const distance = Math.hypot(
        projectile.x - enemy.x,
        projectile.y - enemy.y
      );
      if (distance - projectile.radius - enemy.radius <= 0) {
        if (enemy.radius - 10 > 5) {
          enemy.radius -= 10;
          setTimeout(() => {
            projectiles.splice(projectileIndex, 1);
          }, 0);
        } else {
          setTimeout(() => {
            enemies.splice(enemyIndex, 1);
            projectiles.splice(projectileIndex, 1);
          }, 0);
        }
      }
    });

    const distPlayerEnemy = Math.hypot(player.x - enemy.x, player.y - enemy.y);
    if (distPlayerEnemy - enemy.radius - player.radius <= 0) {
        cancelAnimationFrame(animationId);
    }

    enemy.update();

  });
}
animate();
The resizing of an enemy goes too fast, we can use a library call GSAP to make this resizing smoother.
Todo
- [ ] In
index.html, add GSAP library with this script tag just before the script tag forindex.js - [ ] In
index.js, replaceenemy.radius -= 10;by this code
gsap.to(enemy, {
  radius: enemy.radius - 10,
});
Step 8 - Create particles when a projectile hit an enemy
First we need a class Particle that extends from Enemy, with an alpha property, specific draw and update methods that use this alpha property.
Todo
- [ ] Create the
class Particlewhich extends theclass Enemy - [ ] In the constructor, we need a
xand aycoordinates, aradius, acolor, avelocityfrom theclass Enemy, but also a new propertyalpha - [ ] Create new
drawandupdatemethods with these modifications
class Particle extends Enemy {
  constructor(x, y, radius, color, velocity) {
    super(x, y, radius, color, velocity);
    this.alpha = 1;
  }

  draw() {
    ctx.save();
    ctx.globalAlpha = this.alpha;
    ctx.beginPath();
    ctx.arc(this.x, this.y, this.radius, 0, Math.PI * 2, false);
    ctx.fillStyle = this.color;
    ctx.fill();
    ctx.restore();
  }

  update() {
    this.draw();
    this.x = this.x + this.velocity.x;
    this.y = this.y + this.velocity.y;
    this.alpha -= 0.01;
  }
}
With this class Particle, we can create 8 or more particles when a projectile hit an enemy, and we add these particles to a particles array.
Todo
Check if a projectile has hit an enemy
- [ ] Make a
for loopof 8 or more iterations
Inside this loop, push a new Particle in the particles array, with these arguments
- [ ] x and y are equal to the projectile.x and projectile.y
- [ ] the radius is a random value between 3 and 1
- [ ] the color is the enemy color
- [ ] the velocity, x and y are random values, positive or negative
In the animate function after player.draw()
- [ ] Go through all the particles to remove a particle with alpha property less or equal to 0 and update the particles
player.draw();

particles.forEach((particle, index) => {
  if (particle.alpha <= 0) {
    particles.splice(index, 1);
  } else {
    particle.update();
  }
});

enemies.forEach((enemy, enemyIndex) => {

    projectiles.forEach((projectile, projectileIndex) => {
      const distance = Math.hypot(
        projectile.x - enemy.x,
        projectile.y - enemy.y
      );
      if (distance - projectile.radius - enemy.radius <= 0) {
        // particles creation
        for (let i = 0; i < 8; i++) {
          particles.push(
            new Particle(
              projectile.x,
              projectile.y,
              Math.random() * (3 - 1) + 1,
              enemy.color,
              {
                x: (Math.random() - 0.5) * 3,
                y: (Math.random() - 0.5) * 3,
              }
            )
          );
        }

        if (enemy.radius - 10 > 5) {
          gsap.to(enemy, {
            radius: enemy.radius - 10,
          });
          setTimeout(() => {
            projectiles.splice(projectileIndex, 1);
          }, 0);
        } else {
          setTimeout(() => {
            enemies.splice(enemyIndex, 1);
            projectiles.splice(projectileIndex, 1);
          }, 0);
        }
      }
    });

    const distPlayerEnemy = Math.hypot(player.x - enemy.x, player.y - enemy.y);
    if (distPlayerEnemy - enemy.radius - player.radius <= 0) {
      cancelAnimationFrame(animationId);
    }
    enemy.update();
  });
}
Bonus - UI
You can add a modal to start or restart the game, add a score....
You can find in this link a complete solution of this game.